Monday, December 31, 2012

A Clutter-Free Kitchen

My kitchen was out of control. Every time I needed to use a spice, I had to move something out of the way, or I knocked a jar off the shelf. My utensil drawer was a jumbled mess. There was all kinds of crap covering the dining room table. Then I happened across the book It's All Too Much – An Easy Plan for Living a Richer Life with Less Stuff by Peter Walsh who is a professional organizer from TLC's CleanSweep (which I have never watched). As I read it I took many notes. Here is what I got out of it.

Work from the vision of the life you want to live. I saw myself living in a home that was neat, tidy, calm, and peaceful. That vision does not include crammed closets and piles of stuff on the dining room table.

A bit of psychology here, you really do need to understand why you hang on to certain stuff and move beyond it. There are a total of 10 excuses people have to explain why they can't get rid of stuff; here are the first three:

1) I might need it one day. It's this kind of stuff that keeps us from living in the present.

2) It's too important to let go. If you really value an item that much, you need to show it the honor and respect it deserves. For example: Are your family heirlooms hidden in the closet? Does the place this "important item" holds in our life truly reflect the value you claim it has?

3) I can't get rid of it – it's worth too much money. Holding on to the item feels like holding on to the money you spent – somehow. But these items have lost their usefulness. Now you're throwing good space after bad money. Clutter robs us of real value. Think about how much you pay for your house in rent or mortgage. Every square foot of your house is costs you money. Also consider what that clutter now is costing you in ways far beyond the initial financial outlay? In stress? In your health? In your relationships with your family members? In embarrassment?

To get going on decluttering your home, the plan of action is called FAST.
F = Fix a time for your initial declutter
A = Anything not used for 12 months (get rid of it)
S = Someone else's stuff. You are NOT keeping it! (get rid of it)
T = Trash! (no brainer, get rid of it)

Clothes: when you're trying to decide what can stay. Only keep clothes that fit you well NOW, they make you feel good when you wear them, or you get compliments. This book really is about living in the moment – DO NOT save clothes that fit you before or will fit after you lose 5 pounds.

Clothes Hanger Trick: The clothes that are left over after you have weeded them out, turn the hanger the wrong way. After you wear each item, return the hanger to the proper position. After six months it will be obvious which are the clothes you should keep and which ones to discard.

For stuff like books, DVDs, etc. DO NOT go out and buy new storage units to organize them. (Peter Walsh is NOT into buying organizers and shelves; he is into getting rid of all the stuff we really do not need or use.) Use the bookcases and organizers you already have and let that be the guide as to how much to keep. Keep weeding stuff out until it fits in the space. Walsh has a ratio rule that he uses to help you get there. Once you have achieved your goal, every time you buy a new book, one has to go.

To keep magazines under control, limit yourself to three monthly subscriptions. Only keep three months worth. When the new one arrives, recycle the oldest. Don't keep catalogs. If you want something, order it NOW. You can always look it up online if you need to order later. And if you rip stuff out of magazines, set a limit! For example, I will only keep 10 dessert recipes in my file folder. After you have 10, new one goes in, old one goes out!

Kitchen utensils – If you can't get rid of it, put it in a box and if you use it in the next month, it can go back in the drawer.

These are just a few of his tips. This book made an impression on me and since I read it, I have been working on a kitchen drawer or a cupboard a day. It's really exciting and I'm really looking forward to moving beyond the kitchen!

Commit to having a clutter-free home. Clarity, perspective, focus, and a sense of openness all come with a clutter-free space. What better way to start the new year than with a tidy, organized kitchen? All it takes is some motivation and a commitment to do just a bit every day.

You should not have anything in your home that is not beautiful or functional.
– William Morris

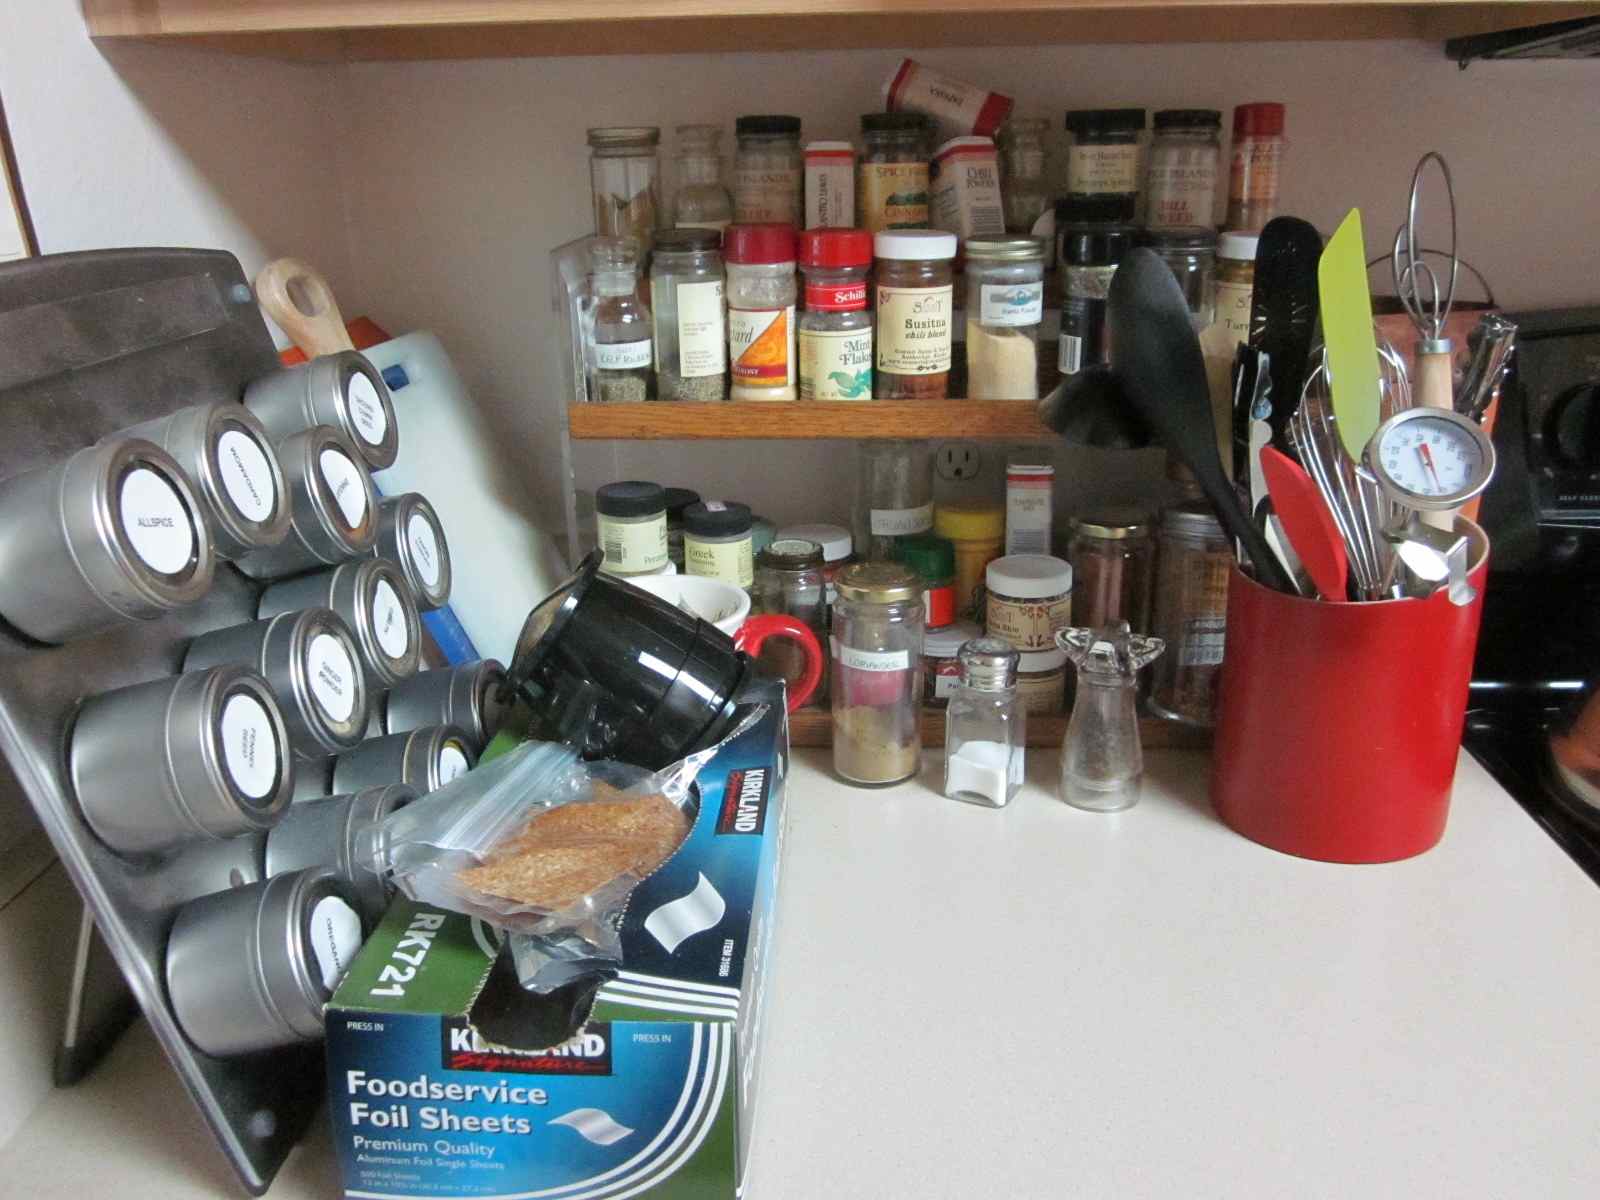
Spice area is cluttered and messy!

Much better, I can see what I need!

Not all that bad, but I can do better!
This really is much better.
Junk drawer before. Peter says you shouldn't even have a junk drawer!
Junk drawer after. Now if I can only keep it this way!

All my baking stuff including sugars – before. What a mess!
Baking cabinet, still too much stuff! Going to have to work on this one.

You get the idea. My kitchen is less cluttered but I know I can do more. I have way too many different types of sugars. I think I'll take half of them, put them in a box in the garage. If I don't use it in a month or so, toss them. Do you really need a dozen different types of sweeteners? Six different types of salt?

Tuesday, December 25, 2012

The Nutcracker Marathon and Quick Christmas Bombay Potatoes and Cauliflower

San Francisco Ballet's The Nutcracker.
I don't have many Christmas traditions beyond watching The Nutcracker on PBS. For the last several years they have been airing the San Francisco Ballet's Nutcracker and it is my favorite. However this year I anxiously scanned their programming looking for The Nutcracker in vain. Every time I searched for The Nutcracker it was only on the Ovation channel which I do not subscribe to. Serious action was needed. I cancelled my Showtime subscription and subscribed to Ovation. Nirvana! On Christmas day, they have Nutcracker marathons! From all over the world!

So I've been watching The Nutcracker off and on all day. Some of them are pretty strange (Nutcracker – The Story of Clara by the Australian Ballet), some not so hot, San Francisco Ballet is there in all their glory (yes!), and I'm now watching the Bolshoi at the Bolshoi. It has the possibility of becoming my new favorite. All of the children's parts appear to be performed by adults and it just seems more polished than many of the rest. No frumpy nightgown for Clara and the dancing is stupendous.

Quick Christmas Bombay Potatoes. Very pretty, red & green!
I had been planning on making a Christmas pizza today but got waylaid by the Nutcracker marathon and this recipe for Saucy Bombay Potatoes. I absolutely love cauliflower and potatoes so I made this instead of the pizza. Many changes were made. The beauty of the recipe is no matter how you change it up, it's going to be good and even better the next day!

Quick Christmas Bombay Potatoes and Cauliflower
Ingredients
1/4 cup onions, chopped
1 tsp avocado oil
2-4 garlic cloves, chopped
2 potatoes (I used Yukon), peeled & chopped
1/2 cauliflower, chopped
1 cup vegetable stock
1/4 cup dark beer (totally optional)
1 tsp garam masala (or your favorite Indian spices)
1/2 tsp turmeric
1/2 tsp mustard seeds
1/2 tsp ground cumin
1 14 oz. can chopped tomatoes
1 TB tamari
freshly ground pepper
1/2 cup frozen peas
1-2 handfuls of fresh spinach
-----
1 TB fresh lemon juice

Directions
Heat oil and saute onion for a couple of minutes. Add garlic and potatoes and cook a couple mintues more, Add cauliflower, vegetable stock, beer, and spices. Stir well, cover and cook for about 5 minutes until potatoes and cauliflower are crisp tender. Add tomatoes, tamari, pepper, and peas and cook for about 5 more minutes. Add spinach and cook until wilted. Take off the heat, add lemon and serve. About 4 servings.


Tuesday, December 11, 2012

The Best Scrambled Tofu

tofu scramble close up

Mmmmm! Moist, spicy morsels of tofu, nestled among sautéed mushrooms and freshly wilted greens of your choice. My favorite to use in this recipe are power greens (a mixture of spinach, mizuna, chards, arugula), baby spinach, or chopped baby kale. This is quick to make and the leftovers are delicious.

Ingredients
1 tub of firm organic tofu (about 14 ounces), packed in water
1/2 package of fresh mushrooms, cleaned and chopped
2 garlic cloves, minced
1 to 2 tsp All American spice mix (see below) or your favorite spice blend
1/2 tsp turmeric
1/8 tsp black salt (optional)
1 TB nutritional yeast
1 TB Tamari
5 ounces of your favorite baby greens

Directions
Rinse and pat dry tofu. Cut in half, wrap in paper towels, and then a kitchen towel and place heavy object on top of it to press out excess moisture. Do this while you chop your mushrooms, greens, and measure out your spices.

A wok works great to make this in especially when it it's time to wilt the greens. Spray the pan with a bit of olive oil and add mushrooms. When mushrooms start to wilt, add the garlic. Sauté a couple of minutes and then crumble in the tofu. Add the spices and stir to evenly distribute the spices. Everything should be nice and yellow. Continue to cook, taking care when you stir to leave a few largish chunks of tofu. When tofu has cooked for several minutes, add the greens, folding in with the tofu mixture. Keep folding in the greens until they are wilted. Dinner is served!

Recipe notes: When you purchase a tub of tofu, open it, rinse the tofu and transfer to another container, fill with water and tightly seal. Change the water daily until you cook the tofu. This helps to keep the tofu nice and fresh. • Black salt adds an sulfur egg-like taste. I usually forget to use it and it doesn't seem to matter. • If you use baby kale for your greens, be sure to chop it because kale tends to be tough, even the baby kale. • If you are a mushroom hater, you can leave them out and just have your tofu and greens, it will still be quite delicious!

All American Spice Mix
Original recipe from American Vegan Kitchen. You can use this spice mix in all kinds of dishes. 
1 TB ground cumin
2 tsp cayenne
1/2 tsp onion powder
1 TB smoked paprika
2 tsp garlic powder
1 tsp ground coriander
1 TB dried parsley
1/2 tsp black pepper
1/2 tsp dried mustard
1/2 tsp red pepper flakes
1/4 tsp ground allspice
1/8 tsp ground cloves

Directions
Combine all ingredients in a small skillet over medium heat and stir constantly for about 2 minutes until fragrant. Make sure it doesn't burn. You can skip this step but it really does make a difference in bringing out the flavor of the spices. Cool completely and store in a tightly covered jar. Makes about 1/2 cup.


tofu scramble and hash browns
Go to town and make some hash browns too!

One year ago...this recipe is pretty awesome!
Fresh Cranberry Pumpkin Bread

fresh cranberry pumpkin bread


Saturday, December 1, 2012

Chocolate Chip Cookies for Everyone - soft, chewy, non-dairy & egg free

chocolate chip cookies vegan style

These chocolate chip cookies disappeared before 10:30 a.m. when I brought them to work. They're soft, chewy, loaded with chocolate chips, and oh, so delicious.

The recipe is adapted from Vegan Cookies Invade Your Cookie Jar, one of my go-to cookbooks. Every recipe I've tried has been delicious. Here is the original recipe posted on 6 Bittersweets blog. You can choose to follow the recipe exactly or change it slightly. The batter is a bit loose so be sure to leave room between scoops when you bake them.

My changes:
1/4 cup brown sugar replaced with 1/4 cup blond coconut sugar
1/4 cup white sugar replaced with 2 TB organic cane sugar
1-1/2 cups flour replaced with 3/4 cup spelt flour & 3/4 cup all purpose flour

The next time I make it I will replace ALL of the all purpose flour with half spelt and half whole wheat pasty flour. Mmmmm!


Thursday, November 22, 2012

Single Serving Vegan Brownie with Secret Ingredient

Unbelievable! Non-dairy, egg free and so delicious!

I've been making the single serving brownie recipe from the Happy Herbivore for a couple of years now. It's okay but I find it a bit too sweet and I'm not totally enamored with the whole wheat pastry flavor. But it's a great recipe to have around for when you have a "brownie emergency." I've been fiddling around with the recipe, changing and reducing sugars and trying out different flours. I found that replacing the applesauce with pumpkin puree makes a less sweet brownie that is wonderfully moist. I also switched out the whole wheat pastry flour with spelt flour. This let the chocolate flavor shine through. This is a moist, chocolately treat that just takes minutes to throw together. Enjoy!

Oh yeah, check out the melted chocolate chips!
Ingredients
2 TB spelt flour
1 TB cocoa powder
1/8 tsp baking powder
-----
1 TB blond coconut sugar
1 TB pumpkin puree
1 TB maple syrup
1 TB soy milk
1/8 tsp vanilla extract
-----
1 TB vegan chocolate chips

Directions
Preheat oven to 350 degrees and lightly oil a small ramekin. Mix the dry ingredients together in a small bowl. In another small bowl, mix the wet ingredients. Pour the wet ingredients into the dry, and mix until no lumps remain. Add the chocolate chips and mix again. Scrape into ramekin and bake for 20 minutes. Cool on rack.

One Year Ago...
I made delicious Cheesy Quinoa Garbanzo Cups. It was so yummy it's going to be the main dish at my Thanksgiving dinner.

Wednesday, November 21, 2012

Vegan Cooking for Carnivores – a book review

We have such a wonderful library system in Anchorage. We have our main library and several small branches. The Loussac Library was part of several projects built during "Project 80s." It's four stories, with meeting rooms on the first floor, books on the 2nd and 3rd floors and the 4th floor is the media collection. There is a huge collection of cookbooks and I love to browse through them.

A new addition to their collection is Vegan Cooking for Carnivores – Over 125 Recipes So Tasty You Won't Miss the Meat (hey! have they been reading the intro to my blog?!) by Roberto Martin. He is the personal chef for Ellen DeGeneres and Portia de Rossi. Roberto is not a vegan but still got the job, and they seem pretty happy with his cooking. He has compiled a book of recipes that even non-cooks can make. Lots of instructions, pictures and tasty recipes. I was struck by his "keep the techniques, change the ingredients." He says in order to cook meatless, first identify the technique that exists in a recipe and categorize the ingredients of the recipe in terms of proteins, acids, liquids, and fats. Then substitute the non-vegan ingredients, such as soy milk for cows milk, or soy proteins for meat. He really simplifies the whole process. As Portia says, "Instead of making vegan food, he made food vegan."

Chapters include:
The Pantry and Some Basics
Breakfast
Lunch
Appetizers and Snacks
Soups
Salads
Pizza, Pasta, and Pasta Sauces
Entrees
Sides
Beverages
Desserts
Condiments, Sauces, and Dressings

Some recipes I'd like to try:
Tofu Benedict with Chipotle Cream
Avocado Reuben
Roasted Corn Dodgers
Spring Rolls with Dipping Sauce
Beluga Lentil Caviar on Blini
Spicy Noodle Salad
Quinoa & Cranberry Salad
Grilled Apple and Pear Salad with Organge Citrus Dressing
Barley and Kale Salad with Strawberry Vinaigrette
Blackened Tofu Caesar Salad
Chopped Asian Salad
Almond Pesto Pizza
Tal's Fresh Pasta
Homemade Ravioli with Tofu Burrata & Mushrooms
Arrabbiata Sauce
Puttanesca Sauce
Pierogi
Faux Pho
Chiles Rellenos with Creamy Barley and Vegetables
Baby Bok Choy with Crispy Tofu and Sprouted Brown Rice
Corn Pudding
The Perfect Scratch Margarita (yes!)
Fresh Tomato Mary
Vegan La Bete Noire - the Black Beast (a rich, dense, chocolate cake)
Basic Cheesecake

I didn't list any recipes that used any of the mock meats such as Gardein Chick'n Scallopini because I'm just not into those types of recipes at this time in my life.

This is a very accessible vegan cookbook, highly recommended for people who are "vegan-curious" or new vegans unsure of what to eat. I found lots of interesting recipes even for someone who doesn't "miss the meat."


Saturday, November 17, 2012

Pumpkin Oatmeal Chocolate Chip Cookies with Chocolatey Drizzle


Oh boy. These are good. I will have to say though that they have lots of sugar and fat, more than I usually bake with. I did use less sugar than the original recipe and the next time around I will use even less. I brought these to work and they were all gone by mid-afternoon which means everybody liked them. Here is the original recipe from The Sweet Life blog in all its glory with some stunning photos.

Pumpkin Oatmeal Chocolate Chip Cookies
1/2 cup whole wheat pastry flour
1/2 cup organic all purpose unbleached flour
1 cup quick oats
1/2 tsp baking soda
1/2 tsp baking powder
1 tsp cinnamon
1/8 tsp ginger
1/8 tsp nutmeg
1/8 tsp cloves
1/4 tsp salt
-----
1/2 cup Earth Balance vegan butter
1/4 cup plus 2 TB Sucanat sugar
1/4 cup plus 2 TB organic cane sugar
1/2 cup + 3 TB pumpkin puree
1/2 tsp vanilla extract
1/2 cup chocolate chips
-----
chocolate drizzle (recipe below)

Directions
Preheat oven to 350 degrees. Line baking sheets with parchment paper. In a medium bowl combine flour, oats, baking powder and soda, spices, and salt. Mix together and set aside.

In a large bowl, beat with a mixer the vegan butter and sugars together until light and fluffy. Add pumpkin puree and vanilla. Stir to combine.  Slowly add the dry ingredients, mixing together until combined. Fold in the chocolate chips.

Drop cookies onto baking sheet, about 2 tbsp each. Press down lightly and bake for 10-12 minutes, until edges golden. Let sit for a minute and then move to a rack to cool. Drizzle chocolate over the cooled cookies. Let harden before putting into container.

Chocolatey Drizzle
1/3 cup vegan chocolate chips
2-3 TB vegan butter
1/2 tsp vanilla
1 cup powdered sugar
2 TB or more of non-dairy milk

Directions
Heat chocolate chips and butter in microwave in 30 second intervals, stirring in between, until melted. Add vanilla, sugar and 2 TB of non-dairy milk and mix until smooth. Keep adding milk 1 TB at a time until thin enough to drizzle over cooled cookies.


Sunday, November 11, 2012

Pumpkin Beer Tasting – Some Local, Some Not

Quite a variety of different pumpkin beers, all purchased at LaBodega in Anchorage, Alaska.
In keeping with the pumpkin theme this month, I'm now surrounded by seven different beers. It's quite amazing how different they all are. I will reveal what I think is the best and worst at the end of my post. Originally I was going to buy seven different single 12 ounce beers. I really didn't want a whole six pack; this was a tasting. When I got to the store they only had two different brands that came in 12 ounces bottles but plenty of others in 22 ounce. So I purchased the two 12 ounce beers and the rest were in the big bottles. I purchased the beer at LaBodga which is a locally owned store. I really love to shop there because they will split up six packs of beer, and the staff is knowledgeable and very helpful. They have a super collection of beers.

Please keep in mind, this is just my own opinion. Everyone has different tastes. My taste in beer runs to brews such as Great Divide Hibernation Ale (no longer available in Alaska). I really enjoy dark, smooth, brooding, sipping beers such as Thelonius Monk Belgian-Style Abbey Ale. For something "lighter," I'd go for Sierra Nevada Tumbler. I absolutely despise "beers" such as Bud, Coors, Michelob Light, etc.

Here are the seven pumpkin beers in tasting order, with my impressions:

Buffalo Bill's Brewery America's Original Pumpkin Ale 5.2% ABV / 12 ounce bottle $1.50 LaBodga
Ale brewed with real pumpkin and natural spice flavor.
Brewed in Hayward, California. Here are my tasting notes: "Kind of hazy, not obnoxious in any way, effervescent, mild, very drinkable, pleasant enough. Very good with veggie pizza. I like it!!" This one really grew on me as I drank it. I would commit to buying a six pack of this one. Three stars - good.

Shock-Top Pumpkin Wheat 5.2% ABV / 12 ounces bottle $1.50 at LaBodega
Belgian-style wheat ale brewed with pumpkin and spices.
This is a mass produced beer by Anheuser-Busch. It already had three strikes against it because I am pro micro-brewery. Not fair, but I did try to keep an open mind. It was unfiltered which I love in a beer. Here are my tasting notes: "Pours hazy, non-offensive, a little rough around the edges, not aware of any spice or pumpkin, not enjoying this the way I did the Buffalo Bill (see above), kind of harsh, not so great with my veggie burger and home fries. Started to get a headache, dumped the rest." One star - didn't like it.

Midnight Sun Brewing Co. Treat Imperial Chocolate Pumpkin Porter 7.8% ABV / 30 IBUs / 22 ounce bottle $9 LaBodega 
Ale brewed with pumpkin, cocoa nibs, cinnamon, cloves & nutmeg.
Brewed in Anchorage, Alaska. A porter but without the coffee notes. This beer rocked my world! Dark, tasty, not too boozy, right amount of hops, just lovely! Tasting notes - "Deep dark, smooth, quite delicious." My tasting buddy felt it was a dessert drink but we were swilling (and loving it) with hummus and pita bread. 5 stars - loved it!

Midnight Sun Brewing Co. Trickster 7% ABV / 22 IBUs / 22 ounce bottle $7.95 LaBodega
Belgian-Style Ale brewed with pumpkin & spices.
Brewed in Anchorage, Alaska. Loved the label. Unfortunately I'm not a great fan of light Belgian-style beers and we tasted this at the same time as the Treat. Tasting notes – "Pours clear, light copper color, faint spicy smell, okay." My tasting buddy and I were a little underwhelmed. I have another bottle of this and will try it at a later date by itself. Two stars - fair.

Elysian Night Owl Pumpkin Ale 5.9% ABV / 18 IBUs / 22 ounces bottle $4.95 LaBodega
Ale brewed with pumpkin and pumpkin seeds and fermented with spices.
Brewed in Seattle, Washington. I guess from the name "Night Owl," I was expecting a dark beer. It's not. Tasting notes: Pours clear, light copper color, pretty head, doesn't smell or taste of pumpkin or spices, pleasant enough, okay." Two stars - fair.

Elysian Hansel and Gretel Ginger Pumpkin Pilsner 4.5% ABV / 22 ounces bottle $7.95 LaBodega
Tasting notes: "Golden color, kind of hazy, smell that ginger(!), refreshing, whoa ginger(!), soapy(?), I don't think I care for this beer." Capped the bottle and there it still sits in the refrigerator. One star - didn't like.

Two Beers Brewing Co. Pumpkin Spice Ale 5.2% ABV / 19 IBUs / 22 ounce bottle $6.50 LaBodega
Brewed with pumpkin, nutmeg, cloves, allspice and cinnamon.
Another Seattle, Washington brewery. I really like these guys 'cause they sell beers in 12 ounce aluminum cans which is important since you can't recycle bottles in Anchorage anymore! Tasting notes: "Pours clear, light amber, mmmm, mmmmm, lightly spicy, very pleasant, enjoyable beer." Drank half and capped the bottle and finished it off the next day. Four stars - I liked it!

The hands-down winner was the Midnight Sun Treat. My next favorite was the Two Beers Pumpkin Spice Ale. The worst was a draw between the Elysian Ginger Pumpkin Pilsner and the ShockTop Pumpkin Wheat.


Wednesday, November 7, 2012

Sourdough Bread with Kamut Flour and Baked Potato made with a little help from your bread machine

Another version of delicious sourdough potato bread.
I try to bake a loaf of sourdough bread every couple weeks and I have been refining a recipe for Sourdough Potato Bread. I have literally made a variation of it eight times already. It's rarely perfect and that's what I love about homemade bread – it's usually edible even when the recipe doesn't come out as expected. I'm always switching out the flours, mixing process, baking times, etc. No wonder the results are never the same!

The inspirational recipe is from "How to Make Bread" by Emmanuel Hadjiandreou and I really don't get his methodology. He mixes it up, lets it sit for 10 minutes, hand kneads it in the bowl for 10 seconds, and he does this four times before letting it rise for an hour. The dough is kind of wet and I find the whole process "difficult." So I just do it "my" way. And that's with as little hands-on time as possible!

This time around I decided to use my bread machine for the initial mixing and rise. I also wanted to use some kamut flour. I was very pleased with the results. I like the mild taste of the kamut flour and I found my sourdough rising more robustly after the initial rise in the bread machine. Next time I am going to increase the amount of kamut flour to half instead of just a third of the flour total. I'm also going to use my new assistant again – the bread machine!

I like to slice and freeze it after a couple of days. It makes awesome toast!

Warning: If you don't have much experience make bread from scratch this probably isn't the best loaf to start on. My directions could be more detailed, but really, I'm kind of winging it myself!

Note on measurements: I use ounces, cups and grams. Successful bakers weigh their ingredients and I try to use grams for my flours. Liquids and salt are just easier using cups and teaspoons. What I really need to do is learn to use baker's percentages... Makes 1 loaf.

Sourdough Bread with Kamut Flour and Baked Potato

Ingredients
1 medium potato, scrubbed and baked (about 5 oz. after baking)
-----
250 g active sourdough starter
2/3 cup warm water
2 tsp olive oil
10 g vital wheat gluten
200 g all purpose bread flour (organic, unbleached, unbromated)
100 g kamut flour
1 tsp salt
5 oz baked potato including the skin, crumbled

Directions
Select dough setting on bread machine. Add all the ingredients in the order listed. Turn bread machine on and let it do its thing. Be sure to take a look and make sure dough doesn't look too wet or too dry. You do want this dough to be a bit sticky.

After finishing first rise in bread machine, scrape from bowl onto lightly floured surface. Let sit for 10-15 minutes and then gently pull into rectangle, folding into thirds, rotate and again fold into thirds. Form into ball and put in lightly oiled bowl and cover and let rise until doubled.

Gently move from bowl onto lightly floured surface and gently pull into rectangle folding into thirds, rotate and again fold into thirds. Form into ball and place smooth size down into brotform bowl.

When it's almost double in size, preheat oven to 425 degrees. I like to bake in a clay pot so I put that in the oven at this time. When dough is doubled gently invert onto parchment paper, slash the top, and place in the preheated clay pot. Bake for 30 minutes, remove lid and bake for about 15-20 more minutes until done. You can test with thermometer gauge reading of 190-200 degrees or tap on the bottom, it should sound hollow.

Homemade tahini is quick and easy to make.
One year ago...
Homemade tahini. Have you priced tahini lately? The price just seems to keep going up. Fight back and make your own.


Wednesday, October 31, 2012

Chocolate Pumpkin Loaf

Mmmmm. Chocolate Pumpkin Loaf with chocolate chips!

As mentioned in a previous post I've gone pumpkin-crazy and here's another recipe celebrating pumpkin goodness. I've been "reading" the cookbook Forks Over Knives by Del Sroufe. It includes desserts by Isa Chandra Moskowitz of Post Punk Kitchen. The recipe is on Isa's website and the only difference between her recipe and the one published in Forks Over Knives is the website recipe includes 2 tablespoons oil. I did not use any oil in this recipe and it was great!

I kept to the recipe and used my homemade pumpkin puree. I did not change out any flours or sugars this time around. Next time I'll make it with whole wheat pastry flour or a blend.

This loaf is delicious, moist, and not too sweet. I'm just going to give you the link to Isa's recipe and keep in mind that you can skip the oil. She has a lot of good commentary about making the recipe.


This Chocolate Pumpkin Loaf tastes as good as it looks.

Getting ready to dig in to a piece of Chocolate Pumpkin Loaf!


Monday, October 29, 2012

Homemade Pumpkin Puree

Fresh organic pumpkin.

It had to happen. Online it's pumpkin this, pumpkin that, everyone is going pumpkin crazy including myself. I'm making pumpkin muffins, pumpkin loaves, pumpkin lattes and now pumpkin puree.

It's pretty darn easy to make your own pumpkin puree. Then you are guaranteed it's fresh, if organic it will be pesticide free, and you won't need to worry about BPA from the can.

Directions for making your own pumpkin puree
Preheat oven to 350 degrees and line baking sheet with parchment paper. Wash your pumpkin(s). Slice off the top including the stem. Invert onto cutting board, flat side down. Slice in half. Scoop out seeds; a serving spoon works great. What you do with the seeds is your business. Place cut side down on baking sheet and bake for about 1 hour until easily pierced with fork.

This was baked for 60 minutes in 350 degree oven. See how nice and soft it is?

Let cool. To skin, just pull it off. It comes off very easy. Place the pulp in food processor to smooth it all out. You could probably use a blender. My puree was a bit watery so I drained it in cheesecloth overnight.

Here is my puree before letting it drain a bit.

The organic pie pumpkin I bought was just over 2 pounds. After baking I ended up with just under 2 cups. Then I decided I wanted to thicken it up. After I drained it, I ended up with just under 1 cup. I would definitely recommend letting it drain a bit. You don't want to ruin a recipe with puree that is too watery. Next time I'll bake 2 or 3 pumpkins.

This is what I made with my homemade pumpkin puree. Watch for the recipe in an upcoming post.

Chocolate Pumpkin Loaf studded with chocolate chips; recipe Forks Over Knives cookbook.


Wednesday, October 24, 2012

Mexican Baked Potato Soup with Potato Wedge Croutons

Spicy Mexican baked potato soup

I've been getting into baked potato soups because 1) there are delicious local potatoes available in the stores; 2) it's relatively quick to make if you pop the taters in the oven ahead of time; 3) I adore potatoes! Although I used a whole fresh jalapeno pepper in this, it wasn't hot, just pleasantly spicy. This soup includes chopped scallions, carrots, corn and of course, baked potatoes. It's relatively low fat because the potato is used as thickener instead of heavy creams or milk. I did not peel the potatoes. If the taters are well scrubbed and baked in foil they are quite lovely in the soup. More fiber too!

I used half of one of the baked potatoes to make the Potato Wedge Croutons for the garnish. If you'd like more croutons, bake an additional potato. Makes 2-3 servings.

Mexican Baked Potato Soup

Ingredients
2 medium russet potatoes, baked, roughly chopped
-----
1-2 tsp avocado oil
2 garlic cloves, minced
1 carrot, minced
2 scallions, chopped
1 fresh green jalapeno, seeded and chopped
1 tsp cumin
1/2 tsp coriander
1/4 tsp turmeric
fresh pepper, salt to taste
1 TB low sodium Tamari
2 cups heated non-dairy milk (I used soy)
1 cup fresh or frozen corn
2 TB fresh parsley, chopped

Directions
To bake the potatoes, preheat oven to 375 degrees, scrub, lightly oil and seal in aluminum foil and bake for 60-75 minutes until very soft. Cut in half and let cool. Roughly chop.

Prepare and get the potato croutons (see below) baking while you make the soup.

Heat oil in medium saucepan. Add garlic, carrot, scallions, and jalapeno and saute for several minutes. Add spices, tamari and soy milk. Add potatoes and lightly mash to break up potatoes and thicken soup. Add corn and parsley and heat for about 5 more minutes until heated through. Ladle into bowl and garnish with potato croutons.

Baked Potato Croutons
Cut half of one of the baked potatoes in wedges. Place on baking sheet, lightly spritz with oil, sprinkle with salt, pepper, garlic, and paprika. Bake in oven heated to 425 degrees for about 15-20 until edges are starting to brown.

One year ago...
Cinnamon buns with vanilla maple icing. These were awesome!
Delicious homemade cinnamon buns with maple icing.


Wednesday, October 17, 2012

The Perfect Vegan Brownie Part One: Chocolate Pumpkin Brownies with Hazelnut Brown Nectar Ale

Deeply chocolate, moist brownies, with hints of hazelnuts

It's surprising to me that I very rarely make brownies since I quit consuming eggs and dairy. My favorite recipe back in the "old days" was from an out-of-print McCall's Cookbook. The recipe used eggs, probably milk, butter, white flour and sugar. I liked it because it was quick and scratched that chocolate itch. But there's no way I'd make anything like that now. Many of the vegan brownie recipes I've come across either have tofu or black beans, neither of which holds great appeal. When I received Kathy Hester's recipe for Hazelnut Ale Brownies in my in box I just had to make it. It had all the right ingredients: whole wheat pastry flour, pumpkin, cocoa, and the most exciting ingredient of all  – Rogue's Hazelnut Brown Nectar Ale! A win-win situation: 1 cup of beer for the recipe and the rest for me! Did I mention it's a very tasty brown ale?

Try as I might, there's no way I can make a recipe without tweeking it. It just seemed to me it needed some sort of leavening, there was no soda or baking powder. Maybe the beer helped with that but I wasn't going to take a chance so I added soda and baking powder. There was an awful lot of sugar so I used half Sucanat and half organic sugar. The recipe also used olive oil which I switched with canola oil.

I'm not overly fond of nuts in my brownies so I just put nuts in half the batter. I roasted the hazelnuts and then finely ground them in my small blender. They were actually too finely ground, almost like a meal instead of small nut pieces. Maybe next time, I'll just roast the nuts, cool them, and then hand chop. These are moist (not gooey) brownies with a deep chocolate taste. I think they would be lovely with a drizzle of raspberry sauce.

This is a big batch of brownies, filling a 13x9 glass baking dish. Next time I might halve the recipe. I am also looking forward to trying it out with different beers. I have a bottle of Kassik's Chocolate Cherry Stout. I think it would be great in this brownie. Kassik's recommends serving the beer with chocolate desserts.

Here is the recipe with my substitutions and additions:

Chocolate Pumpkin Brownies with Hazelnut Brown Beer

Ingredients
Whisk 2 TB ground flax seed with 1/4 cup warm water in small container and set aside
-----
2 cups whole wheat pastry flour
1 cup cocoa
½ teaspoon salt
1 tsp baking powder
1/2 tsp baking soda
-----
1 cup pumpkin puree
1/2 cup canola oil
3/4 cups Sucanat evaporated sugar cane juice
3/4 cups white organic evaporated sugar cane juice
1 teaspoon vanilla
1 cup Rogue Ale Hazelnut Brown Nectar Ale
1/4 cup toasted hazelnuts, minced in food processor

Directions
Preheat oven to 350. Lightly spray a 13x9 baking pan with cooking oil.

Mix the sift dry ingredients in a large bowl.

In a smaller bowl mix the pumpkin and oil together, then add the sugar. Mix well and then add the flax mixture, vanilla, and beer.

Add the wet mixture to the dry and gently mix until combined. Spread about half into prepared baking dish. Fold nuts into remaining batter and then spread the rest into baking dish. Bake for about 30 minutes until it starts to crack on top and pull slightly away from sides. Cool, slice and enjoy!


Watch for more brownie recipes. I want to try out some of the healthier recipes incorporating different grains, tofu and even black beans!

One year ago...
I was making Chocolate Stout Cupcakes! They were pretty awesome and wonderful with a bit of stout beer.

Tuesday, October 9, 2012

Vanilla Pear Coffee Cake


 Even though you can't see them, there are delicious little nuggets of pear in this coffee cake.

I woke up this morning and there was snow on the ground. In September! I'm also fighting a cold so I felt the need for wintery, comfort food.

I also have the "I must bake today" feeling. First I wanted to make some brownies. Believe it or not, I've yet to make a vegan brownie recipe. But I was more in the mood for some homemade cinnamon rolls. While looking for the perfect cinnamon roll recipe, I came upon this recipe. Since I had two beautiful ripe pears, I decided to make the coffee cake.

This recipe is adapted from the cookbook Blissful Bites by Christy Morgan. I like her recipes because she uses whole grains and unrefined sugars. It's a bright colorful cookbook just like the recipes.The recipe is a "three-bowler" but worth it. It uses flours that may not be in your pantry: barley and brown rice flour. It's a nice change from whole wheat flour. The fat used is coconut oil which I greatly prefer instead of Earth Balance margarine.Whenever I make baked goods with Earth Balance margarine I don't care for the flavor. I find coconut oil more neutral and I did not detect any coconut flavor in this coffee cake. If you are concerned about a coconut flavor, be sure to buy the refined coconut oil.

All in all I enjoyed this coffee cake. It really didn't take all that long to prepare and it was soooo much better than anything you could buy in the grocery store!

Topping Ingredients
3/4 cup barley flour
1/2 cup coconut palm sugar
2 TB coconut oil, melted
1 tsp lemon juice
1 tsp cinnamon
-----
1 cup chopped pear

Cake Ingredients
1 cup barley flour
1/2 cup brown rice flour
1 tsp baking powder
1 TB flax meal
1/2 tsp salt
1/2 tsp cinnamon
-----
3 TB coconut oil, melted
3/4 cup coconut palm sugar
1/2 cup plus 1 TB applesauce
2 tsp vanilla extract
-----
1/2 cup soy milk or any other non-dairy milk
2 tsp apple cider vinegar

Directions
Topping: Mix all the ingredients together except for the pear. Mix well and then add the pear and set aside.

Cake Directions: Preheat oven to 350 degrees and lightly oil 8x8 pan. Add the dry ingredients in a medium size bowl, mix, and set aside. Whisk together coconut oil and sugar. Add the applesauce, vanilla and milk. Mix again. Add wet to dry and mix until combined. Spread in pan. Add the topping mix and press into batter. Bake for 50-60 minutes until toothpick comes clean.


One year ago...
Cinnamon Buns with Maple Vanilla Icing. These were very tasty and even made with Earth Balance margarine which I won't do again. The next time I make this recipe I will use some coconut oil instead of the Earth Balance margarine!

Tuesday, October 2, 2012

Broccoli Mushroom Stir Fry with Tempeh

 You can see the soybeans in the squares of tempeh

I've never been on the tempeh bandwagon. Perhaps I've avoided it because it's close to being a meat analogue which is not in my diet. I've never ever missed eating meat and some of the mimic-meats gross me out because they are so very meat-like. But I do like tofu which is also made from soybeans. Tempeh is fermented soybeans, pressed into a firm cake-like square. It's important to simmer the tempeh in water for 30 minutes to get rid of the bitter taste.

I figured it was time to try it out and what better way than in a stir fry? I am happy to report that after my initial reservation I really enjoyed it! The leftovers were great and I enjoyed every last morsel. I'll be trying out more tempeh recipes in the near future.

This stir fry is excellent over quinoa.

Ingredients
8 oz. package of tempeh
1-2 tsp avocado or olive oil
2 tsp cornstarch
salt & pepper to taste
-----
1-2 tsp avocado or olive oil
8 ounces mushrooms, sliced
1/2 red bell pepper sliced
2 garlic cloves, minced
1-2 tsp fresh ginger
2-3 cups of finely chopped broccoli, steamed until barely tender
-----
3 TB soy sauce
2 TB filtered water
1 TB mirin
1/2 tsp ume plum vinegar
2 tsp toasted sesame oil
1/2 tsp crushed red pepper

Directions
In medium saucepan simmer tempeh in water for 30 minutes. While tempeh is simmering, steam broccoli until barely tender, drain, and run cold water over to keep green color and stop cooking.

When tempeh has simmered for 30 minutes, drain, cool and cut into 1/2 inch squares. Toss in cornstarch, salt and pepper. Heat oil in medium pan and saute until lightly browned. Set aside.

In wok, heat oil and saute mushrooms and bell pepper until mushrooms release moisture. Add garlic and ginger and stir fry for a minute or so. Add broccoli, tempeh, and rest of seasoning ingredients. Taste and adjust seasonings if needed. Stir fry until thoroughly heated through and serve over quinoa or brown rice.

Tempeh in its "raw" state.

One year ago Spicy Kale Chips...

Two years ago Warm German Potato Salad...perfect for your Octoberfest celebration!


Tuesday, September 25, 2012

Humble Hemp Seed Muffins


These sturdy muffins are made with whole grains and lightly sweetened with applesauce and maple syrup. The tiny hemp seeds add a very pleasant, light nutty taste. If you've never baked with hemp seed nuts, perhaps it's time to check them out. They are little nutritional powerhouses loaded with essential fatty acids in addition to being a complete protein. Shop around for them because they can be expensive. Store in your freezer.

When I first made these muffins I was underwhelmed and felt they weren't sweet enough, with a lot of ingredients for a basic muffin. But they really grew on me as I ate them and by the end of the batch I found I was craving them. This time around I lightly sprinkled the tops with a bit of cinnamon sugar. This recipe is an adaptation of Dreena Burton's apple-hemp muffins from her 2007 cookbook Vive le Vegan! Makes about 14 muffins.

Ingredients
1-1/2 C whole wheat pastry flour
1 cup ground oats*
1/2 cup hemp seed nuts
2 tsp baking powder
1 tsp baking soda
1/4 tsp salt
1/2 tsp cinnamon
1/4 tsp nutmeg
1/4 tsp ginger
1/8 tsp cardamom
-----
1 cup unsweetened applesauce
1/4 cup pure maple syrup
1 cup plain soy milk or other non-dairy milk
1 tsp vanilla extract
3 TB canola oil

Instructions
Preheat oven to 350 degrees and prepare muffin tin. In large bowl, mix all dry ingredients. In small bowl mix together wet ingredients. Add wet to dry and mix until just incorporated. Fill each muffin tin about 3/4 full. Bake 25 minutes until toothpick comes out clean.

*I like to buzz some quick cooking oatmeal in a blender to make this oat flour.

One year ago quick Bread Machine Pizza Crust...

Two years ago Rainbow Chard Tofu Quiche...

Tuesday, September 18, 2012

Chocolate Chocolate Chip Cookies

Chocolately with whole spelt goodness!

This is a wheat-free cookie made with spelt flour. It is adapted from a cookie reicpe in Let Them Eat Vegan by Dreena Burton. I seriously love this cookbook. Many times I buy a cookbook, look it over, think "that looks good," and put it on the shelf where it gathers dust. Not with this book. I've made many of the recipes and the majority have been wonderful. This cookie is one of them. My tasters were raving about them. Recipe makes about 14-20 cookies depending on how large your scoop is.

Ingredients
1-1/4 cup spelt flour
1/4 cup cocoa powder
3 tablespoons blond coconut sugar
1/3 cup vegan semi-sweet chocolate chips
1/4 tsp salt
1 tsp baking powder
1/4 tsp baking soda
------
1/4 cup plus 1 TB pure maple syrup
1-1/2 tsp vanilla extract
1/4 cup canola oil
4 tsp soy milk

Don't blame me if you eat it raw!
Directions
Preheat oven to 350 degrees and prepare baking sheet with parchment paper. Sift dry ingredients into medium size bowl. Mix wet ingredients into small bowl. Pour wet ingredients into dry and mix until just incorporated. Drop onto cookie sheet. I like to use a tablespoon scooper. Flatten and bake for 11 minutes. Cool on wire rack. Try not to eat them all!


What I was baking last year in September...
Peanut Butter Cookies with Chocolate Chip Garnish

Wednesday, September 12, 2012

Indian Spiced Baked Potato Soup

Just enough spice to make it interesting!

Last Wednesday I had oral surgery. (For details on THAT go to end of this post.) Doctor’s orders: soft food for a couple of days. And, I needed comfort food. For me, that’s potatoes. Potato soup to the rescue! But it can't be bland.

This recipe uses a couple of pre-baked potatoes. I did not peel them; potato skins are full of good-for-you fiber. The potatoes are used to thicken the soup. A bit of carrot and some peas add pretty flecks of color. Fresh onion, garlic and Indian spices really perk this recipe up. No vegetable broth is needed. I was shocked at how tasty this soup was. You will never open a can of potato soup after making this.

Ingredients
2 russet potatoes, scrubbed, rubbed with a bit of oil and wrapped in foil.
-----
2 tsp avocado or extra virgin olive oil
1 carrot, minced
2-3 TB chopped onion
2 garlic cloves, minced
1/2 tsp mustard seeds
1/2 tsp cumin seeds
-----
1/2 tsp turmeric
1/2 tsp powdered cumin
1/2 tsp coriander
1/4 freshly ground pepper
1/2 tsp salt
1 TB low sodium Tamari
1/2 cup frozen peas
2 cups unsweetened non-dairy milk (I used soy)
2-3 TB fresh chopped parsley

Directions
Scrub, oil and wrap potatoes in foil. Bake at 375 degrees for about 75 minutes, until nice and soft. Unwrap, cut in half and let cool while you prepare the rest of the soup.

Heat oil and lightly sauté carrots and onion for a couple minutes in medium size pan. Add garlic and sauté some more. I like to add the garlic a bit later so it doesn't get overly brown. When the veggies are limp, add the mustard and cumin seeds and sauté for a minute or so. Be careful of any popping mustard seeds. Add rest of dry spices and stir for a minute. Preheat the milk in microwave for about 90 seconds. Add Tamari, peas and milk to pan. While gently heating, chop up potatoes in small cubes. Add to pot, mashing some to thicken soup. Add parsley and serve.

-------------

One year ago...
Mexican Cabbage

Two years ago...
Thick Gooey Chocolate Sauce

----------

WARNING. Explicit dental surgery details below!
Some people don’t care to hear about this stuff. For those of you who really do want to hear about it, this is for you.

The sad part of dental care is it seems that no matter how much you do, eventually you may lose a tooth (or more!). When I grew up, there were no sealants and fluoride treatments and my whole adult life has been one of trying to keep what I’ve got, whatever it takes. Most of my childhood fillings have been replaced with crowns. I’ve had several root canals. It all seems to be temporary fixes until the next tooth crisis comes along. Crowns break and need replacing. Root canals go south. My tooth #5 had a root canal and crown and just kind of dried up and developed cracks. The only thing that could be done was extraction followed by a bridge or tooth implant.

Amazingly, the teeth right next to #5 were unmolested, original adult teeth. I loathed the idea of getting a bridge and having to crown the good teeth to support the false tooth. It seemed that a tooth implant was the best route to go.

A tooth implant is a rather time-intensive process. We’re not even going to discuss the costs. First the doctor had to extract the failing tooth. It literally fractured into pieces during extraction and still there were a couple of shards that worked their way out afterwards. Then I needed to let it heal for a couple of months and get x-rays to make sure there was enough bone to support a tooth implant. The next step was the placement of a titanium post into my jaw bone. The doctor cut open my gum and then drilled a hole into my jaw bone and placed the post. There it will sit for about 6 months, fusing to the bone. There will be a couple of checks during this time to make sure all is well, it’s fusing correcting, etc. When totally fused with the bone, the doctor will open the gum up again and attach an abutment to the original post. My regular dentist will attach the new tooth to this abutment.

The whole thing sounds rather gory and painful. So far it hasn't been too bad and actually not as unpleasant as a root canal or crown. Three days after the post implant I was feeling much better than I did after the extraction and I think I'll probably be able to quit taking Advil pretty soon. The delicious baked potato soup is all gone and that's okay because tonight I'm having my Seriously Green Pizza. All is well in my world!

Have any of you had a tooth implant? I'd love to hear about someone else's positive experience.

Saturday, September 8, 2012

Off Topic – Great Alaska Quilt Show

This weekend is the Great Alaska Quilt Show. I browsed through the show this afternoon and took photos of stuff that caught my eye. I didn't take notes so details are limited. Show is also Sunday, Sept. 9th at the ConocoPhillips atrium from 10am-4pm.

The small quilt auction closes Sunday at 2pm. One auction quilt that caught my eye was this one.
Very interesting 3D quilt.

My favorite large quilt was a kaleidoscope quilt. Much prettier in person but you get the idea.


Deb Hardman usually figures prominently at Anchorage quilt shows. Here is a small quilt she made.

I guess 3D is the rage in small quilts these days.

There were several quilts similar to the one below, same color scheme, same type of pattern made by a group of people including Pam Sims. They all were for sale for several hundred dollars. It was some kind of charity, I just don't remember! To be honest, I wasn't wild about them. I've just never seen quilts sold at the show before.

Looks like some kind of quick cut and sew and what happens, happens!
Here is a rather cute vest from the clothing section.

Vest front.
Back of vest.
The featured quilter was Linda Postlewait. Those are always fun to view because it's a whole group of quilts made over the years. The following three quilts caught my eye.

You all recognize this! Linda's own Starry Night.
Linda's husband took a picture and she made a quilt of it.
You really do need to see this one in person. A very different holiday quilt.