Tuesday, October 15, 2013

VeganCuts September 2013 Beauty Box Review

VeganCuts September 2013 BeautyBox

 Here is my $19.95 haul for September 2013, in order of how much each item thrilled me.

nyl whipped hand and body lotion
This must have been a bonus gift because it was not listed as one of the items for September. A small jar of whipped hand and body lotion by nyl. The jar had a date that it was made with a note to use within 4 months. Bravo to them. While I adore hand crafted creams and lotions I get really bummed out when the oils go rancid. The lotion was creamy and not too heavy. The ingredient list was awesome – 7 items, none unpronounceable. The nyl skin care line is vegan and cruelty free, chemical free, gluten free and made with organic ingredients. The sad thing is I won't be buying the lotion as 4 ounces will set you back $34. Ouch. But you never know, I might win a lottery...


Second runner up was a 2 ounce bottle of daily benefits shampoo by BWC. I am in the market for a good, cruelty free shampoo without chemicals so I am looking forward to trying this one out. VeganCuts also included a nice brochure about the company which I appreciate. Sometimes I get tired of googling everything. This shampoo is available on Amazon (yippee!) for $11.62 with free Prime Shipping. That is actually cheaper than the shampoo I get now. Can't wait to try it!

Runner up number three is four lotions and a packet of body oil by Weleda. The lotions are Wild Rose, Sea Buckthorn, Pomegranate, Citrus and Citrus Body Oil. Who knows, maybe I'll fall in love with one of them! The lotions are reasonably priced and available on Weleda website and Amazon.

A couple of personal use items included in the BeautyBox was a packet of personal lubricant. (I'm afraid to even ask what's in Astro Glide!) There was also a coupon to redeem online for GladRags free pantyliner with free site-wide shipping.

Manic Panic Pretty in Punk Eye Shadow
Coming in last was a full size Manic Panic Eyeshadow Collection with gray and blue shadows. I'm sure many subscribers were absolutely thrilled with this but I'm past the days of wearing blue eyeshadow.

Overall, I liked my VeganCuts BeautyBox and I think it was good value for $19.95 shipping included. It exposes me to many brands I'd never see or get to try out. There has been a couple of stinkers; I think I will be having a giveaway one of these days for the Manic Panic eye shadows and some nail wraps that came with the August 2013 BeautyBox. Details to come.


Sunday, September 29, 2013

Helyn's Apple Cinnamon Baked Oatmeal

I had never heard of Baked Oatmeal until I saw this recipe on Helyn's Healthy Kitchen. As much as I love steel cut oats I'm getting a little tired of them and this looked like a nice change. It is very quick to throw together. I like to let it cool, slice into portions, wrap and freeze. Every night I take one out and let it thaw in the refrigerator for the next morning's breakfast. I pretty much follow Helyn's recipe except for using 2 tablespoons of ground flax, 1 tsp of cinnamon and maple syrup for the sweetener. I also like to cook it the full 40 minutes. Please go to this link to see some nice photos and the full recipe.

Apple Cinnamon Baked Oatmeal
I know, I know. Kind of looks like dessert, doesn't it?


Sunday, September 15, 2013

Chewy Chocolate Chip Cookies, Wheat Free, Oil Free

 chewy chocolate chip cookes, vegan, fat free, wheat free

Oh, my. I've been working on the recipe for Barley and Oat Mini-Chocolate Chip Cookies, Fat Free. I tried subbing out the banana with applesauce and used maple syrup. It made a fairly soft, fragile  and sweeter cookie. It was not an improvement. Today I used some blanched almond flour and stuck with the brown rice syrup. Hot diggity dog was it good! Still soft but nice and chewy. I am so inspired by this new recipe I am going to start making my own almond milk and saving the pulp. Then I will dehydrate it and use it for baking.

Ingredients
1/4 cup barley flour
1/4 cup oat flour
1/2 cup blanched almond flour
1/4 tsp aluminum-free baking powder
1/4 tsp baking soda
1/8 tsp salt
-----
3 TB mashed banana
1/3 cup brown rice syrup
1/2 tsp vanilla extract
----
1/3 cup chocolate chips

chewy chocolate chip cookes, vegan, fat free, wheat free
Directions
Preheat oven to 350 degrees and prepare baking sheet. I like to use a Silpat or parchment paper instead of greasing sheet. Mix dry ingredients in medium sized bowl. Mix wet ingredients in small bowl. Add wet to dry and mix well, add chips. Scoop 1 tablespoon size drollops onto sheet, flatten a bit and bake for about 12 minutes until barely browned on edges. Let cool for a couple minutes and then carefully transfer to wire rack.

Substitutions and Tips and Tricks
If you don't have any barley or oat flour, buzz whole barley or oatmeal up in your blender or coffee grinder. Or you could always buy a small bag of Bob's Red Mill. Most natural foods stores have these flours in the bulk bins too. Bob's also carries almond flour but you could also make your own!

Saturday, September 7, 2013

Barley and Oat Mini-Chocolate Chip Cookies, Fat Free

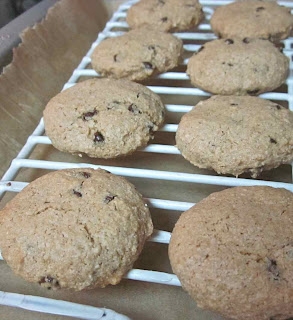
wheat free chocolate chip cookies

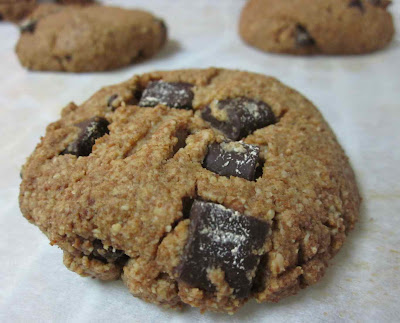
These are tasty little wheat-free nuggets when you must have a cookie (or two). They're not very sweet so there's no sugar rush. The recipe makes about 16-18 tablespoon sized cookies; you can fit them all on one cookie sheet. See below for substitution suggestions.

cookies cooling on rack
Ingredients
1/2 cup barley flour
1/2 cup oat flour
1/4 tsp aluminum-free baking powder
1/4 tsp baking soda
1/8 tsp salt
-----
3 TB mashed banana
1/3 cup brown rice syrup
1/2 tsp vanilla extract
----
1/4 - 1/3 cup mini chocolate chips

Directions
Preheat oven to 350 degrees and prepare baking sheet. I like to use a Silpat or parchment paper instead of greasing sheet. Mix dry ingredients in medium sized bowl. Mix wet ingredients in small bowl. Add wet to dry and mix well, add chips. Scoop 1 tablespoon size drollops onto sheet, flatten a bit and bake for about 12 minutes until barely browned on edges. Cool on wire rack.

Substitutions and Tips and Tricks
If you don't have any barley or oat flour, buzz whole barley or oatmeal up in your blender or coffee grinder. Or you could always buy a small bag of Bob's Red Mill. Most natural foods stores have these flours in the bulk bins too.

If you don't have brown rice syrup, you can use maple syrup. Or agave. But then I can't say you won't get a sugar rush. They will definitely be sweeter if you sub out the brown rice syrup.

The original recipe used 3 tablespoons of oil. I substituted that with the mashed banana. There's such a small amount of banana you really can't taste it. I plan on trying pureed prunes instead of bananas the next time I make these.

If you don't have mini chocolate chips, freeze some regular chips and just chop them up. Or not. If you have the big chips or chunks, just press one into the top of each cookie.

wheat free chocolate chip cookie with big chocolate chip

Sunday, September 1, 2013

How to Publish a YouTube Video using a Canon PowerShot and iMovie


I am no expert but I've been wanting to posts videos to YouTube for some time now. I am posting this in the hopes of saving someone else the grief of banging their heads against the wall. Once you figure it out, it's easy.

I absolutely did not want to have to buy or download any extra programs. I didn't want to buy a camcorder. I wanted to use what I had. I downloaded the video from my camera to an Apple PowerBook using OSX 10.7.5.

The Camera

I have an inexpensive Canon PowerShot SD1300 IS Digital ELPH. I bought it a year or so ago for less than $200. It takes decent pictures and I've found I can make movies with it! I did have to buy another larger memory card. I picked up an 8 GB card at Fred Meyers for less than $10. My movies are less than 15 minutes so that's plenty of memory. I do have a little tripod.

Video Editing Software

I bought iWork several years ago so I have iMovie 11. It's kind of clunky, funky, but gets the job done. I did suffer through a few videos on how to use it. At this point I am just a hack able to delete bits and pieces and export the video. But later on, I can add fancy stuff.

There is more than one way to get your video to YouTube. The most successful way for me was to go to the iMovie menu:
Share
Export using QuickTime.

Here are the QuickTime settings recommended by YouTube:

Video Settings:
Compression: H.264
Frame Rate: 30
Data Rate: automatic
Key Frames: automatic
Frame Reordering: unchecked

Audio/Sound:
Format: AAC
Show advanced settings & choose constant bit rate as encoding strategy

Choose original size of the video. For my Canon 1300 it is 640x480 VGA
Prepare for internet: fast stream

These settings will export in .mov format which is acceptable to YouTube. It took my 9:37 minute video about 30 minutes to convert. It was a big file.

YouTube

Go to your YouTube account and choose upload and follow the prompts. My .mov file was over 248 MB; I don't know if that is normal or not. But it did upload in less than 30 minutes – successfully! Don't be discouraged if you have problems. Just go to the help section, Google the error message, work through it. Good luck and have fun!

Karen going through the beautybox
Still shot of the video shot from my Canon Powershot.
I'll be posting the video with my review of VeganCuts August 2013 Beauty Box.


Friday, August 30, 2013

Four Books and One Move Review

These are all food related in one way or another.

The Lucky Ones – My Passionate Fight for Farm Animals

by Jenny Brown, founder of Woodstock Farm Animal Sanctuary
What an amazing person. This gal was 10 years old when she was diagnosed with bone cancer and eventually lost part of her leg below the knee. When she was in her teens she made the connection between food and animal exploitation. She eventually founded the Woodstock Animal Sanctuary, whose mission is the hands-on work of rescuing, rehabilitating and caring for farmed animal refugees — as well as educating the public about the horrific treatment of animals who are raised for food.

This is her journey, along with stories of some of the animals. The book is highly readable with a friendly, casual style. The back of the book includes resources for further reading, films, cookbooks, websites and some recipes. This book shows how much a determined person can do and really make a difference.


Defiant Daughters – 21 Women on Art, Activism, Animals, and The Sexual Politics of Meat

Defiant Daughters – 21 Women on Art, Activism, Animals, and The Sexual Politics of Meat
I have had a copy of The Sexual Politics of Meat by Carol J. Adams for over 20 years. I have yet to read it. It just isn't an easy read even though I do enjoy non-fiction. All of the contributors of Defiant Daughters have read the book and credit it with the awakening of their identities as feminists, activists, and women. I did find most of their stories interesting. I have drug out my copy of The Sexual Politics of Meat and hope to read it before 2014!


Warrior Pose – A War Correspondent's Memoir. How Yoga (Literally) Saved My Life 

 Warrior Pose – A War Correspondent's Memoir. How Yoga (Literally) Saved My Life
by Brad Willis aka Bhava Ram
What a powerful book. And what does it have to do with food? Towards the end of the book he eventually becomes a vegan. But that is just a very small part of the book. This guy was a successful war correspondent. At the height of his career he breaks his back and manages to work through the pain and deny that it is broken. Eventually he has to get it fixed, the surgery fails (of course!) and he is permanently disabled. Then comes all the alcohol, medications, and to top it all off he is diagnosed with throat cancer. He was treated for cancer and then they could do no more and gave him a couple of years to live. Talk about bad to worse. He ends up abandoning Western medicine and goes to a pain management center which leads to yoga. Today he is pain free and cancer free. This book is so well written. Some memoirs are boring. Not this one. His talent for writing shines. This is a memorable book that I think will be lodged in my brain for a long time to come.

Great Gluten-Free Vegan Eats from Around the World.
Fantastic, Alergy-Free Ethnic Recipes

 Great Gluten-Free Vegan Eats from Around the World. Fantastic, Alergy-Free Ethnic Recipes
by Allyson Kramer

I was lucky enough to win this book online. Most recipes have a color picture. The chapters are African, European, South & Central America, Asian & Oceanic Fare and North American from Canada to Mexico.

Recipes that caught my interest

Africa: Peanutty Parsnip and Carrot Soup; Spiced Lentil Harira Soup

Europe: Pain Ordinaire, a crusty white bread; Roasted Tomato and Beet Bisque, a good way to try out more beets; Veggie Frittata with Salsa Verde; English Cottage Pie although I'd leave out the TVP and use some lentils instead; Baked Pierogi with Dilled Sour Cream

South & Central America: Fennel and Kale Corn Bread; Caribbean Black Bean Soup; Farina Pizza, the crust is made from garbanzo flour

Asia: Tofu Noodle Soup (Pho); Savory Stuffed Grapes (stuffed with chickpeas and spices); Masala Mushrooms (stuffed with cauliflower and spices); Vietnamese Salad Wraps; Spinach Mushroom Curry; Indian Crepes with Sorrel and Spinach; Australian Veggie Pie

North America: Mini Potato Skins; Baked Potine; Cheddary Cheese Wheel (a cashew based nut cheese); Maple Pumpkin PIe with Cinnamon Walnut Crust

What I don't like about this book is the heavy use of faux meats, cheeses and coconut cream. Some of the recipes are fried. Only a couple of dessert recipes caught my eye but there are sweets in each section. This would be a good book for a transitioning vegan or someone who wants to eat less meat and desires gluten free meals. Quite the variety of recipes.

Vegucated – DVD

Vegucated
Synopsis: Part sociological experiment and part adventure comedy, Vegucated follows three meat- and cheese-loving New Yorkers who agree to adopt a vegan diet for six weeks. Lured by tales of weight lost and health regained, they begin to uncover the hidden sides of animal agriculture that make them wonder whether solutions offered in films like Food, Inc. go far enough. This entertaining documentary showcases the rapid and at times comedic evolution of three people who discover they can change the world one bite at a time.

I enjoyed this moved except for the part where they showed them the "hidden side of animal agriculture." I really, really wish everyone would acknowledge what goes on in factory farming. There is such a disconnect between that hunk of beef, hamburger, etc., and where it comes from. I've seen it and don't need to anymore. I get it. Every time I think of a chunk of aged cheddar cheese I visualize that poor cow in miserable conditions. But I digress. The movie was entertaining and two of them are still vegan (although there have been slip ups) and one is still struggling.


Saturday, August 24, 2013

Whole Grain Confetti Salad with Lemon Tahini Dressing

rice salad, confetti salad

I love cold rice salads and this is a good one. The base is short grain brown rice, flecked with lightly steamed broccoli and carrots, uncooked chopped zucchini and red cabbage. Add any vegetables you like; these just happen to be my favorites. The zesty lemon tahini dressing is adapted from Blissful Bites cookbook. I highly recommend this book, lots of photos. The author uses very little oil and many of the recipes have a macrobiotic slant. This is a wonderful recipe to make ahead of time and eat for several days.

Ingredients
3/4-1 cup raw brown rice
-----
1 cup chopped broccoli
1/2-3/4 cup chopped carrots
------
1/2 medium zucchini chopped
1/2 cup finely chopped red cabbage

Directions
Cook rice according to package directions and set aside.

Lightly steam broccoli and carrots, until crisp-tender, rinse in cold water and drain.

Make dressing (see below). Place brown rice, and all the vegetable into large bowl. Mix well. Add dressing to taste, mix and refrigerate.

Lemon Tahini Dressing
1/4 cup fresh lemon juice
2 tsp white miso
2 tsp maple syrup
1-1/2 TB tahini
1 TB low sodium tamari
1 TB brown rice vinegar
sea salt and pepper to taste

Mix in blender. Makes about 1/2 cup.

Friday, July 12, 2013

Potato Sourdough Bread with Spelt and White Whole Wheat Flour

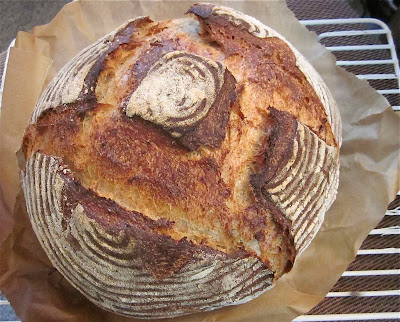
potato sourdough bread with spelt and white whole wheat flour

This bread is big, soft and airy with a chewy crust, and a mellow sourdough flavor. The ingredient list includes freshly ground spelt and white whole wheat flours because I enjoy their less assertive flavor. I find that when I bake with all whole wheat flour it is overpowering.

Ever since I began to maintain a sourdough starter I've been working on improving my "artisan" loaves. I've found that I really prefer the taste of my starter to others and making your own artisan bread is a whole heck of a lot cheaper than buying bakery bread. In Anchorage, Alaska I have spent $9 on a single loaf of artisan bread. It really does not take a whole lot of effort to make bread; you just have to plan ahead and show up every few hours and lay your hands on it.

Soudough bread making tips and tricks that work for me:
1) The texture of sourdough bread is improved if it has baked potato or even baked yams included in the list of ingredients.

2) A very active starter. My starter had been fed once a day, for 3 days in a row.

3) Include a resting period of 15 minutes after the ingredients are mixed.

4) Resist the urge to add too much flour.

5) Use a heavy duty stand mixer.

Potato Sourdough Bread with Spelt and White Whole Wheat Flour
This recipe is a very bastardized version of Potato Bread from Ed and Jean Woods' "Classic Sourdoughs" book. The original recipe uses all purpose flour, milk, and butter which have been replaced with non-dairy milk, extra olive oil and whole grains. Makes one large loaf.

 Ingredients
1 cup sourdough starter (100% hydration, AP flour)
1 cup non-dairy milk
1 TB extra virgin olive oil
-----
1 tsp salt
1 medium baked potato, crumbled, skin included
-----
1 cup spelt flour
1 cup white whole wheat flour
2 TB vital wheat gluten plus enough organic all purpose flour to equal 1 cup (16 TB total)
-----
extra flour for dusting or added if too wet

Directions
Add starter, non-dairy milk, and extra virgin olive oil into mixer bowl. Mix. Add salt and crumbled potato. Add all three flours and mix well, using dough hook. After it's mixed, let it sit for about 15 minutes. This lets it absorb the flours.

Mix on medium speed for about 6-10 minutes until dough passes the "window pane" test and is smooth and satiny. It will be sticky! Try not to add extra flour unless it is hopelessly wet. There is a happy medium in regards to flour and it depends on how humid it is, the flours, etc., etc. This is why I like to use a mixer, it can be a bit wet and sticky and I don't have to handle it.

Put in lightly oiled bowl or container; cover and let rise until double. Rising time will depend on how warm it is in your kitchen and how active the starter. I put my dough on top of the refrigerator and it was doubled in about 5 hours. You could let it rise overnight. The longer it rises the more pronounced the sourdough flavor will be.

After it has doubled, use a spatula to gently ease the dough out onto a lightly floured board. Allow the dough to rest for 30 minutes. If it gets REALLY flat, knead in additional flour before shaping.

Flatten the rested dough slightly, then lift each side to the center, turn and do it again to form a ball. Gently pinch closed. Place the shaped loaf seam side UP in a proofing basket that has been sprinkled with flour. Cover, and let rise for 2 to 4 hours until it doubles in bulk. I like to bake my artisan loafs in a La Cloche, that has been preheated for an hour in a 450 degree oven. Bake for 25 minutes, take off the lid, and bake 15 more minutes to brown. Cool on wire rack. DO NOT cut into the loaf for at least an hour.

-----

This is how I make my bread. If you continue to bake your own bread, you will end up using methods that suit YOU and that is the beauty of baking bread. There are many different ways to do it and who's to say which is the right way? I say the right way, is the one that works for YOU.

-----
This post has been submitted to wildyeastblog.com/.


Thursday, July 11, 2013

Bake awesome artisan bread in La Cloche Brick Oven

lacloche baker

"Also known as an instant brick oven, this bread baker consists of a stoneware bell or dome that fits over a wide, shallow dish with 2-inch-high sides. It is one of the most successful implements developed for home baking."—Chuck Williams, founder of the Williams-Sonoma company and author and editor of dozens of books on the subject of cooking.

La Cloche turns your regular oven into a brick oven. It helps to create an artisan style bread with a crisp, chewy crust. I really like the results I get from the one I purchased online from Breadtopia. They cost around $50-$60 and can be found online and at some kitchen stores.

If you search online for how to use a La Cloche, you will see there's more than one way to bake with it. Here is my method:

1. About an hour before I plan to bake, I place the La Cloche on the bottom rack in the oven and set it to 450 degrees.

2. When I am ready to bake the bread, I transfer the risen dough from a Brotform basket and invert it onto a piece of parchment paper. Slash the top of the dough. Open the oven door, pull out rack, and carefully remove the top of the La Cloche baker and set it aside. Lift the bread dough by the edges of the parchment paper and carefully transfer to the bottom of the La Cloche baker. Place the lid back on, push the oven rack back in, close the door and bake for 25 minutes. Remove the lid and finish baking the bread until it is done, usually about 15 minutes. Cool baked bread on wire rack.

large bread dough whiskIf you are serious about baking artisan breads this is a nice way to do it. Some people have great success with a dutch oven or even clay pots but I wanted one of these and haven't regretted it. It's held up well and my bread is delicious.

And while you're at it,  do yourself a favor and buy a large Danish Dough Whisk. These are super handy devices to mix doughs by hand. I like the large one because it's easy to clean.

Please watch for next post on one of my most successful loafs of bread yet – potato sourdough bread with spelt and white whole wheat flour.

Potato Sourdough Bread with Spelt and White Whole Wheat Flour baked in La Cloche


Sunday, June 16, 2013

Spicy Roasted Sprouted Chickpeas


Do you find beans hard to digest? I do, even after years of cooking my own beans and following all the tips and tricks: Soak beans overnight and discard soaking water, boil with kombu, etc. Beano was never an option because it's expensive, especially if you take some every time you eat beans. I prefer a more holistic approach.

A couple of weeks ago I read about sprouting beans before cooking them, something that had never occurred to me. The method: Soak the chickpeas overnight, and then sprout them over a couple of days. Cook the sprouted chickpeas for about a hour. Wow, what a difference it made in their digestibility.

I had some leftover sprouted chickpeas (uncooked) and figured they'd be delicious roasted – and they are! A spicy, delectable treat for your salad. These sprouted chickpeas are much tastier than using canned or cooked. After baking them, they remind me of roasted potato.

For greater detail on sprouting and the digestibility of beans, read this ForTheLoveOfFood blog post. It may seem like a hassle to sprout before cooking but I'm here to tell you it's really not. I like to keep goodies sprouting all the time. It's like having a garden right next to the sink. It's cheap, easy, quick, and empowers you in your choices of what to eat.

Spicy Roasted Sprouted Chickpeas
1 cup dry chickpeas
 Avocado oil
Susitna Chili Blend

Cover chickpeas with water and soak overnight. Drain, rinse, and drain again and place in sprouting container. Rinse and drain 2-3 times a day until a tiny sprout starts to emerge from the peas. Rinse, drain, and pat dry.

Preheat oven to 350 degrees. Toss chickpeas in a bit of avocado oil, spicy chili blend to taste, and spread onto cookie sheet. I like to line the sheet with parchment paper. Stir chickpeas every 10 minutes until lightly browned. They take about 25 minutes to roast.


Sunday, June 2, 2013

Triple Dipped Carob Frozen Banana Bites

triple carob frozen banana bites

I've been watching "Arrested Development" on Netflix. I never watched it when it was originally aired on TV but when Netflix released a new season and I read all the hype I decided to watch a few of the original episodes. I've seen half a dozen and they are funny. The action takes place in Newport Beach, California, my hang out when I was a kid.  The Bluth family owns a frozen banana stand on Balboa Island. When I was a teen we'd drive out to Balboa Island specifically for frozen bananas. I don't know if that stand exists any more but I consumed many of their frozen bananas. Now I'm on a frozen banana jag. Expect more recipes!

This first recipe is for a frozen banana that can be eaten after 6pm and will not interfere with your sleep. I love and adore chocolate but it's a no-no in the evenings. Carob powder is a decent stand in and won't keep you up at night.

If you have a Silpat sheet, use it for this recipe. The frozen bananas will not stick to it and you will be dipping the banana pieces 3 times. The recipe uses only one banana but of course you can make several. There will be a lot of sauce left over that you can use for more frozen bananas, ice cream topping, carob mochas, carob banana smoothies, whatever!

Ingredients
1 very ripe banana (or more)
-----
1 cup non-dairy milk
1/2 cup toasted carob powder (I used Bob's Red Mill)
1 TB coconut oil
1 TB agave syrup
1 TB maple syrup
1/2 tsp vanilla
1/2 tsp chocolate extract (optional)


Directions
Peel and slice banana into about 6 pieces, put toothpick in top and set cut side down on Silpat sheet on cookie sheet. Drape loosely with plastic wrap. Freeze for about 1-1/2 hours.

In the meantime, make the sauce. In a small sauce pan, heat the milk and carob powder. Bring to a simmer and add coconut oil. Simmer for 2-3 minutes. Take off heat and add sweeteners and extracts. Taste and adjust sweetness. I found 2 tablespoons about right. Let sit to cool.

When banana pieces are frozen, take out, hold by toothpick and dip into carob sauce. Place back on Silpat sheet and put back in freezer for an hour. Dip again and let freeze another hour. Dip a final time and freeze for about an hour. They are ready to eat! I like to store them placed loosely in a plastic container.

Next post: Triple Dipped Almond-Chocolate Frozen Banana Bites

A year ago: I was making Steel Cut Oats. If you haven't tried steel cut oats, you are missing out. Here is a recipe to make some tasty steel cut oats ahead of time in your slow cooker for those busy mornings when you don't have time to cook! http://karensvegankitchen.blogspot.com/2012/06/seriously-spectacular-steel-cut-oats.html


Saturday, May 18, 2013

Spicy Tortilla Soup with Fresh Greens and Avocado

spicy tortilla soup with fresh greens and avocado
I made this batch with black beans and
cut my tortillas in strips before I baked them.

Seems kind of crazy to be making soup on May 17 but when I left work yesterday it was snowing, it snowed all night and it's snowing now. To me, that is soup weather.

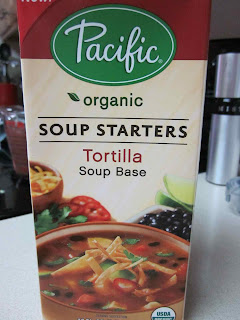
My new kitchen love is Pacific Organic Soup Starters, specifically the Tortilla Soup Base. It is so incredibly tasty I do not add any spices – at all. I just saute some chopped onion and garlic, add the soup base, the rest of the ingredients and cook for 10 minutes or so. This stuff is amazing. I figured it had to be super high in fat and sodium so I finally looked on the nutrition panel and was shocked to see only 15 calories per serving and 290 mg of sodium. Oh, and ZERO fat. Another great feature is it's NOT in a can so you don't have to worry about BPA.

If you're unlucky enough to be where it's snowing make it today. If you're hot and sweaty just pick up a container of the soup base and save it for the next rainy day.

Pacific Organic Soup Starters Tortilla soup base
Here's my recipe but you can mix and match to your heart's content.

Ingredients
1/4 cup chopped onion
2 garlic cloves, minced
1 32 oz. container of Pacific Tortilla Soup Base
1 can or 1-1/2 cups cooked pinto or black beans
1/2 cup frozen corn
1/2 cup cooked quinoa
-------
fresh greens or spinach, roughly chopped
1/2 zucchini, chopped
------
Toppings
chopped avocado
thinly sliced or crushed baked tortilla strips

Directions
Saute onion and garlic in large pot until limp. Add soup base, beans, and corn and bring to a boil and simmer for 8-10 minutes. Blend with an immersion blender to thicken a bit. Add chopped greens and zucchini and cook until greens are limp.

Serve in bowl topped with avocado and tortillas.

Tortilla soup with black beans

I made this batch with pinto beans and just crushed my baked tortillas on top. I didn't have any avocado but it was still super delicious.

snow season extended with snow on May 18, 2013 Anchorage, Alaska

This is the view from my porch on May 18, 2013 and the reason why I am making soup instead of ice cream.

Sunday, April 28, 2013

Damn Good Chocolate Stout Cupcakes with Kassik's Chocolate Cherry Stout Beer


I have never been into stout beer even though I am a huge fan of craft beers. I wanted to make some chocolate stout cupcakes and I had some Kassik's Chocolate Cherry Stout in my garage. I don't have a clue as to when or where I bought it. I do that sometimes, go on a beer buying binge, and then it sits for weeks, months, sometimes years. The sad thing is after I tasted it I went to my local store to buy some more and they had none.

This Kassik's beer was something special though. Very dark with a delectable taste. Smooth. Mysterious. The recipe only used 1/4 cup of beer and I happily drank the rest. It was wonderful in this recipe.

The beauty of these cupcakes (beside the beer) is you don't have to frost it. It has a crumble on the top. It is quite delicious and not too sweet. You could probably halve the topping recipe and have enough. The recipe originates with the book Vegan Cupcakes Take Over the World.

Topping
1/4 C all purpose flour
1/4 C cocoa powder
1/4 cup coconut sugar
2 TB canola oil

Cupcakes
3/4 C soy milk
1 tsp apple cider vinegar
-----
1/2 C plus 2 TB all purpose flour
1/2 C whole wheat pastry flour
1/3 C cocoa
1/2 tsp baking soda
1/2 tsp baking powder
1/4 tsp salt
-----
1/4 C stout beer
3/4 C coconut sugarsugar
1/3 C canola oil
1-1/2 tsp vanilla extract

Directions
Preheat oven to 350 degrees. Place liners in muffin tin. To make topping, mix dry ingredients until well blended. Add oil and mix until it's clumped in pea size balls. Set aside.

In large bowl, add milk and vinegar. Mix and set aside. In medium size bowl, add flour, cocoa, baking soda, baking powder and salt. Mix well. Add the rest of wet ingredients including sugar into the large bowl and mix until frothy. Add dry ingredients in two passes. Mix for a couple of minutes with a hand mixer. Scoop batter into liners. Sprinkle topping on top of each cupcake, taking care that it doesn't sink into batter. Bake for about 22 minutes until toothpick comes out clean. Let cool on rack.


Monday, April 1, 2013

Steamed Buddha Bowl with Super No-Oil Dressing

Buddha Bowl ingredients pictured from top clockwise: red rice, peeled zucchini, steamed carrots, steamed kale and chard, steamed broccoli, and garbanzo beans.
 Buddha Bowl ingredients pictured from top clockwise:
red rice, peeled zucchini, steamed carrots, steamed kale and chard,
steamed broccoli, and garbanzo beans.

I've recently discovered the "Buddha Bowl." What's great about it, is that there is NO recipe. The bowl consists of some greens, grains, a legume, one or two substantial vegetables, dressing, and a topping. The beauty of it is that you don't have to THINK about it. Just dig through the refrigerator and choose what you like. Hopefully you have planned ahead a little and will have pre-cooked grains and legumes. Here are some ideas to get you going.

Greens: chopped spinach, kale, Swiss chard, power greens, watercress, cabbage, escarole, arugula, romaine, chicory, dandelion, etc. Depending on the type of greenery I might steam it.

Vegetables: lightly steamed broccoli, carrots, cauliflower, Brussels sprouts, bok choy, etc.

Grains: brown rice, quinoa, millet, barley, bulgur, farro, etc. Make this an opportunity to try something new. I'm not a huge rice fan and I bought some Heirloom Bhutan Red Rice (pictured above) and I love it!

Legume: I don't believe a traditional Buddha Bowl uses legumes but I like the addition. I enjoy adding cooked garbanzo beans, lentils, white beans, pintos, etc.

Dressing: Your favorite dressing, hummus or just mash up some avocado and lemon. I have included an interesting recipe for an oil free dressing below.

Toppings: Sprouts, chopped nuts, sunflower, sesame, or hemp seeds, kale chips, you name it. Pile it on!

-----

This oil free dressing recipe is from Dr. Greger's website nutritionfacts.org. You must visit it. He has informative, entertaining, and short daily videos. The dressing is slightly tart and delicious. While there is no oil added, it is not a fat-free dressing. Don't fear the fat! Some fat is necessary to help you absorb all the wonderful nutrition you're getting from this meal.

Dr. Greger's no oil dressing
Dr. Greger's Oil Free Dressing
Blend in high speed blender until smooth:
3 TB white miso
1/4 cup brown rice vinegar
1/4 cup water
2 raw carrots, chopped
1 small beet, chopped
1 inch fresh ginger, chopped
1 TB fresh roasted sesame seeds
(I used raw tahini)
I also added:
1 tsp Dijon mustard
freshly ground pepper

Depending on what kind of beet you use, the dressing will be yellow, orange, or red. I used an orange beet and the dressing was a deep golden color. Don't be alarmed by the addition of the beet. You cannot taste the beet, it just adds more nutrition and a beautiful hue to the dressing.

For more ideas here's a Roasted Buddha Bowl with the beans incorporated into a Creamy Lemon White Bean Sauce. You could also make a Mexican Bowl with brown rice, pinto beans, corn, shredded cabbage, zucchini, steamed broccoli, salsa, and avocado. Let's see, Asian Bowl, Indian Bowl, you get the idea!


Sunday, March 31, 2013

Chocolate Oatmeal Brownie Bites

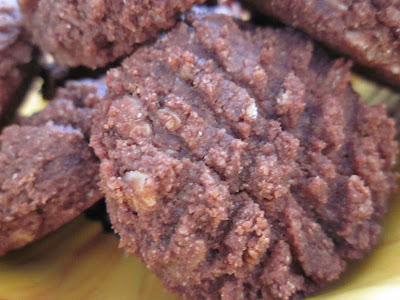
 Chocolate Oatmeal Brownie Bites

If you need a chocolate fix, these are for you. These cookies are soft, moist, with the texture of brownies (more cake like – not gooey) with a most satisfying chocolate flavor. And quick to make. Recipe makes about 20-24 small cookies depending on your scoop and how much cookie dough makes it to the baking sheet. Excellent raw if you go for cookie dough. Recipe is an adaptation of Chocolate Almond Butter Cookies from the Practically Raw cookbook.

Ingredients

Dry Ingredients
1/2 cup coconut flour
1/4 cup almond flour
1/4 cup cacao powder
1 tsp baking powder
1/8 tsp salt
-----
1/4 to 1/3 cup quick cooking oatmeal


Wet Ingredients
1/2 cup almond butter
1/2 cup coconut palm sugar
1/2 cup non-dairy milk
2 TB agave syrup
1 TB ground flaxseed
1 tsp vanilla extract

Directions
Preheat oven to 350 degrees. Measure the dry ingredients (except the oatmeal)  into a large bowl. If any of the ingredients are clumping, take the time to sift them. Stir until combined.

Measure all the wet ingredients into a small bowl and whisk together. Add to dry ingredients. Mix well. Depending on how wet the batter is, add some of the oatmeal. Just add enough so batter is on the stiff side.You know, like cookie dough. The wetness factor depends on how thick/thin the almond butter is. The brand I've been using tends to be on the thin side so I use all the oatmeal.

Scoop onto cookie sheet covered with parchment paper. Press and flatten. I like to use a fork. Bake 8 minutes and cool on rack.

Options: Add some chocolate chips.

Chocolate Oatmeal Brownie Bites


Friday, March 22, 2013

Feeling Fat, Sick, and Nearly Dead? Omega 8006 Juicer to the Rescue!

Omega 8006 Juicer and Nutrition Center

If someone told me two years ago that I would get into juicing, I would have said "no way!" But it has happened. I guess it was inevitable. Part of it was the lust I have for new kitchen appliances and the fact I was having some minor but irritating health problems. It was the perfect storm.

A couple of months ago, I watched the movie "Fat, Sick, and Nearly Dead." I think the movie is a bit extreme but the take-away for me was to supplement my diet with juices. I have been researching various styles and brands of juicers and finally decided that the Omega 8006 was the right juicer for me. Deciding which juicer to get is a very personal decision. You have to decide what is the most important feature(s) and then choose.

1) What is your price point?
2) How important is the quality of juice?
3) How much time are you willing to spend cleaning the juicer?
4) How much time are you willing to spend preparing the produce to juice?
5) How much time are you willing to spend juicing?
6) How important is it that you extract the most juice from the produce?
7) How much room do you have to store it? Can it go on the counter?
8) What types of produce are you going to juice? Roots, leafy tops, fruit? Some juicers handle different types of produce better than others.

Those are lots of considerations but I think if you answer honestly you will buy the right juicer for you. It's also a good idea to spend some time on youtube watching comparisons and reviews.

Review of the Omega 8006 Nutrition Center

The Omega 8006 juicer is a masticating single auger style of juicer that is designed to juice slowly at 80 rpms. There is less oxidation that way. And it is slow. It has a rather small 1-1/2 inch chute in which to feed the produce so you have to cut all the fruit and vegetables small enough to fit. This can take some time.

One huge feature of the Omega 8006 juicer is that it is quiet. The quicker centrifugal juicers (think Jack LaLane and Breville) tend to be very loud.

It is very easy to take apart and clean. There is only one very small area that you have to scrub with a brush.

I like the handle on the top of the unit. It is a bit big but not overly so and has not dominated my counter. I keep in the corner and it's easily pulled out when I want to use it.

The pulp is fairly dry so I feel I am getting most of the juice from my organic produce.

The juice is delicious. The only time I've not been thrilled is when I get carried away juicing things like kale and add too much. I find myself drinking juices that I would never have dreamed of drinking before like dandelion, kale, chard, cucumber, ginger, and beets. I never liked beets but find I love them in my juice!

The price on this unit is around $250 or so. The only thing I really don't like is the fact it's made out of plastic – body, augur, etc. The tiny screen is metal. But it does a pretty good job of looking like it's chrome.

This is called a nutrition center because you can make pasta, nut butters, etc. If and when I use those features I will post a update.

I think some folks could get a bit impatient with the time it takes to prepare the produce, juice, and clean but it's time well spent. I have been drinking a tall glass of juice every day and while my original irritating health "problem" is still around I feel great! Amazingly great.

Saturday, March 16, 2013

Almond-Date-Chocolate Chip Squares

almond date chocolate chip squares with lucuma and maca powders

This is a quick delicious treat full of healthy ingredients. Some of the ingredients you may not be familiar with such as maca and lucuma powder. Maca is a Peruvian superfood made from raw maca roots, which are gently dried and milled. Navitas Products says "mx into smoothies, baked goods, or cereal; may boost the libido, treat menopause symptoms, and promote hormonal balance for men and women." Lucuma has a sweet, maple flavor and is made from the lucuma fruit. It is an excellent source of carbohydrates, fiber, vitamins, and minerals, and contains especially high concentrations of beta carotene, niacin, and iron. Neither product is inexpensive but a bag of it will last a long time and is also delicious to use in smoothies and baked goods.

I got this recipe from LisasProjectVegan and quartered it. Here is the full size recipe; I am not sure how many it makes but my version made about 9 squares. What I really like about Lisa's recipes is the fact most are very quick to make. She cooks all but two meals per week and spends less than 30 minutes making each meal. If you'd like to learn more about how Lisa does it, here is a short video interview. (If you're on a mac you may need to watch it with Safari; it didn't want to work with my version of Firefox.)

You may be tempted to leave out the maca and lucuma since the recipe uses only a small amount of each but don't. Each powder adds a subtle taste profile that I personally found out of this world!

Almond-Date-Chocolate Chip Squares
1/2 cup raw almonds
4 pitted Medjool dates
1-1/2 tsp water
1/2 teaspoon maca powder
1/4 teaspoon lucuma powder
1/4 teaspoon vanilla powder
1/8 teaspoon salt
2 TB cup mini vegan chocolate chips

Directions
Pulse almonds in a mini prep until roughly chopped. Take out half and reserve in a mixing bowl. Chop the dates and add them into the processor along with the water, powders and salt. Process until completely together. Turn out into the mixing bowl with the chopped almonds and add the chocolate chips. Mix well and press into a small pan or container. Chill for an hour and then cut into squares.  Makes about 9 squares.

Recipe Variation
Leave out the 1/8 teaspoon salt and instead sprinkle some coarsely ground red Himalayan salt over the top.


Thursday, February 7, 2013

Quick Chocolate Oatmeal Drops – No Cooking Required


My mother used to make chocolate drops when I was a kid that were so scrumptious. I don't have the recipe but I remember watching her melting margarine in a sauce pan, and then adding white sugar, cocoa and oatmeal. After it was combined, she'd scoop spoonfuls on to a piece of wax paper. We'd eagerly wait for them to cool. Sometimes. They were still great when warm.

While I don't have that recipe I came across instant cookie dough in The Happy Herbivore. After I made them I realized they tasted a lot like my mom's chocolate drops. But without all the fat and unrefined sugar.

Quite honestly, you could do a lot with this recipe. Use peanut butter instead of almond. Sub out the cocoa with raw cacao powder. Use some flaked coconut with the oatmeal. All you need is a consistency that will stick together. Taste as you go, if it's not sweet enough add a bit more maple syrup. You get the idea!

chocolate drops
Ingredients
1/2 cup quick oatmeal
1 TB almond butter
1-1/2 TB maple syrup
1 TB cocoa

Directions
Mix all ingredients until well combined. Scoop spoonfuls onto wax or parchment paper. Let sit a bit to harden. I like to put them in the refrigerator for about an hour. Makes about 6 chocolate drops. Recipe is easily doubled.

Saturday, February 2, 2013

Chocolate Chunk Sandies – Gluten and Dairy Free

gluten and dairy free chocolate chunk cookies

I enjoy trolling the gluten-free blogs and websites mainly because the recipes don't use all purpose flour. I prefer to bake and cook with whole grains especially when bowing down to the sugar god. This recipe uses almond flour. The original name of these cookies are World's Best Chocolate Chunk Cookies (Gluten/Grain/Egg/Starch/Sugar Free & Paleo) from the Real Sustenance website. I followed the recipe using coconut date sugar and coconut oil options. I also had on hand a bag of chocolate chunks so I didn't have to break up a chocolate bar. This recipe was very quick to pull together. I am calling them "Sandies" because the texture reminded me of Pecan Sandy cookies, kind of crumbly but still very delicious.

Here is the recipe, which I successfully halved.


Sunday, January 20, 2013

Ethiopian Red Lentil Stew with Cauliflower, Baby Kale, Peas and Potatoes


red lentil stew with many veggies

What the heck does an Ethiopian eat? I know they typically scoop their food with injera, a spongy flat bread. They also cook with wonderful spices such as a spicy Berbere Blend. The blend I purchased from Summit Spice and Tea consisted of paprika, onion, cayenne, garlic, ginger, salt, fenugreek, basil, pepper, turmeric, allspice, cumin, cinnamon, cardamon, clove, and mace. Whew, that's a lot of spices so save yourself some time and just buy the blend.

This recipe was inspired by Anshu's Red Lentil Sambar in Vegan Fire and Spice by Robin Robertson. I've made it before and every time I change ingredients depending on what I have on hand. The recipe in the book uses Indian Sambar spices. I've also made it with Panch Phora (a whole seed blend of fennel, cumin, brown mustard, nigella, and fenugreek). This is a very forgiving recipe and it's easy to mix and match. This is even better reheated.

Ethiopian Berbere Stew
1 cup red lentils
3-1/2 cups water
----
splash of avocado or extra virgin olive oil
1/2 med. onion chopped
2 medium carrots, chopped
1 TB chopped fresh ginger
3 large garlic cloves, minced
1 tsp brown or black mustard seeds
1/2 to 1 tsp Berbere spice blend
1/2 tsp coriander
1/2 tsp cumin
1/4 tsp cayenne
1 cup vegetable broth
14 oz. can diced tomatoes
1 TB Tamari
1-1/2 tsp Bragg's liquid amino sauce
1 cup chopped cauliflower
1 medium russet potato, chopped
-----
1 cup frozen peas
4 handfuls baby kale

Directions
Pick through the lentils and rinse off. Place in medium saucepan with water and bring to a boil, cook for about 30 minutes until soft. Set aside. Do not drain.

Heat oil in large stock pot and saute onions, carrots and ginger until onions are soft. Add garlic and cook for a couple minutes. Add spices, stir and cook for about a minute. Add rest of ingredients, bring to a simmer and cook for about 15-20 minutes until cauliflower and potato are soft. Add cooked lentils, peas, and baby kale and cook for about another 5 minutes until kale is wilted and everything is good and hot.

Sunday, January 6, 2013

Time to Clean Up with Beet Detox Juice

beet juice in a glass

Who doesn't feel the need to start the new year with healthier eating habits? A simple strategy is to crowd out bad foods with whole, unprocessed, nutrient rich foods. To motivate and energize, here is a detox drink to the rescue. Full disclosure, I dislike beets. I've tried them different ways but still can't get excited about them. So I was very skeptical of this beet juice however gorgeous it was. But Santa brought me a new juicer for Christmas so I feel the need to juice everything in sight and then some.

The original recipe for Beet Detox Juice is from the blog For the Love of Food. This Beet Detox juice turned out to be quite delicious and absolutely gorgeous. I cut back on the ginger so the predominant flavor was garlic. Perhaps I should have followed the recipe and used the full amount of ginger. The beet flavor was fairly unobtrusive. Beets are much easier to enjoy in a drink like this.
Ingredients
1 small garlic clove (large clove if you love garlic)
1/2 inch piece of fresh ginger
5 kale leaves, stems stripped off and discarded
1 lemon, peeled
3 small beets, with the stems and leaves
2 medium carrots, top trimmed off and discarded

Process according to your juicer directions and enjoy!

Wednesday, January 2, 2013

Amazing Zippy Ginger Green Juice Drink

granny smith apple, kale, cucumber, and ginger

This is an "oh wow!" kind of green drink. I wanted to make a green juice with just the basic ingredients: kale, cucumber, Granny Smith apple and a tiny piece of ginger. The very first green juice I made was super grassy and just okay. This one was zesty, refreshing, and quite delicious! I was really surprised at how great it tasted, I was afraid that I was going to have to "acquire" a taste for the green. I think the ginger helped to tone down the kale. This time I juiced only kale leaves, no stalks. I could have used a milder green such as spinach or chard but I really wanted the nutritional punch of kale. Kale is such a powerful green! I will be using it more in 2013 and hope to post a simple kale salad very soon.

Ingredients
about 2 cups of organic* kale leaves
1 whole organic cucumber
1 organic Granny Smith apple,
with the seeds and stem removed
1 very small piece of organic ginger,
about the tip of your finger

Directions
Follow your juicer directions and juice.

*I have specified organic produce since you will be juicing the skins and all.

glass of fresh carrot juice
I also juiced some fairly fresh carrots. How did I know they were fresh? They still had the tops on. I did not juice the carrot tops – yet. I found the carrot juice sweet and a bit bitter, probably because they were not peeled. I think I want to try making carrot juice again next spring when I can get local produce.

Tuesday, January 1, 2013

Omega 8006 Juicer Maiden Voyage

I get these wild hairs about kitchen appliances and decide I just have to have a certain something. This time it was a juicer. Maybe it's the "hunt." Figuring out which one will fit my needs, looking for the best price and finally acquiring it. I did have a lot of fun researching juicers, watching videos on youtube, reading reviews, browsing the local stores, etc.

There are three main types of juicers: centrifugal, masticating and twin gear. The price can be fairly inexpensive (less than $100) to very extravagant (over $1,000).

After much deliberation I decided on a masticating juicer, the Omega 8006 Nutrition Center (less than $300.) It makes a quality juice with fairly quick clean up. It's called a nutrition center because it does other things in addition to extracting juice – nut butters, grind grain and coffee, extrude noodles, and make frozen desserts. I'm hoping to make nut butters and try out the pasta extruder.

It was quick to set up and get going.


Here's a plate of vegetables and fruit – a couple stalks of kale, one carrot, one small apple, and one cucumber.


Here's the juice I got from that plate of produce; about 1-1/3 cups of juice and a bit of very dry pulp.


Here is my green juice. My first reaction was "hmmmm." Barely sweet, kind of tart and grassy. It did grow on me as I drank it. And to be honest, I felt very energized and peppy the rest of the day.

 
I am looking forward to more experimentation. I think for the green juice I want it a bit sweeter. I'm also going to try it with just carrots and see how that tastes. Cheers!