Sunday, April 28, 2013

Damn Good Chocolate Stout Cupcakes with Kassik's Chocolate Cherry Stout Beer


I have never been into stout beer even though I am a huge fan of craft beers. I wanted to make some chocolate stout cupcakes and I had some Kassik's Chocolate Cherry Stout in my garage. I don't have a clue as to when or where I bought it. I do that sometimes, go on a beer buying binge, and then it sits for weeks, months, sometimes years. The sad thing is after I tasted it I went to my local store to buy some more and they had none.

This Kassik's beer was something special though. Very dark with a delectable taste. Smooth. Mysterious. The recipe only used 1/4 cup of beer and I happily drank the rest. It was wonderful in this recipe.

The beauty of these cupcakes (beside the beer) is you don't have to frost it. It has a crumble on the top. It is quite delicious and not too sweet. You could probably halve the topping recipe and have enough. The recipe originates with the book Vegan Cupcakes Take Over the World.

Topping
1/4 C all purpose flour
1/4 C cocoa powder
1/4 cup coconut sugar
2 TB canola oil

Cupcakes
3/4 C soy milk
1 tsp apple cider vinegar
-----
1/2 C plus 2 TB all purpose flour
1/2 C whole wheat pastry flour
1/3 C cocoa
1/2 tsp baking soda
1/2 tsp baking powder
1/4 tsp salt
-----
1/4 C stout beer
3/4 C coconut sugarsugar
1/3 C canola oil
1-1/2 tsp vanilla extract

Directions
Preheat oven to 350 degrees. Place liners in muffin tin. To make topping, mix dry ingredients until well blended. Add oil and mix until it's clumped in pea size balls. Set aside.

In large bowl, add milk and vinegar. Mix and set aside. In medium size bowl, add flour, cocoa, baking soda, baking powder and salt. Mix well. Add the rest of wet ingredients including sugar into the large bowl and mix until frothy. Add dry ingredients in two passes. Mix for a couple of minutes with a hand mixer. Scoop batter into liners. Sprinkle topping on top of each cupcake, taking care that it doesn't sink into batter. Bake for about 22 minutes until toothpick comes out clean. Let cool on rack.


Monday, April 1, 2013

Steamed Buddha Bowl with Super No-Oil Dressing

Buddha Bowl ingredients pictured from top clockwise: red rice, peeled zucchini, steamed carrots, steamed kale and chard, steamed broccoli, and garbanzo beans.
 Buddha Bowl ingredients pictured from top clockwise:
red rice, peeled zucchini, steamed carrots, steamed kale and chard,
steamed broccoli, and garbanzo beans.

I've recently discovered the "Buddha Bowl." What's great about it, is that there is NO recipe. The bowl consists of some greens, grains, a legume, one or two substantial vegetables, dressing, and a topping. The beauty of it is that you don't have to THINK about it. Just dig through the refrigerator and choose what you like. Hopefully you have planned ahead a little and will have pre-cooked grains and legumes. Here are some ideas to get you going.

Greens: chopped spinach, kale, Swiss chard, power greens, watercress, cabbage, escarole, arugula, romaine, chicory, dandelion, etc. Depending on the type of greenery I might steam it.

Vegetables: lightly steamed broccoli, carrots, cauliflower, Brussels sprouts, bok choy, etc.

Grains: brown rice, quinoa, millet, barley, bulgur, farro, etc. Make this an opportunity to try something new. I'm not a huge rice fan and I bought some Heirloom Bhutan Red Rice (pictured above) and I love it!

Legume: I don't believe a traditional Buddha Bowl uses legumes but I like the addition. I enjoy adding cooked garbanzo beans, lentils, white beans, pintos, etc.

Dressing: Your favorite dressing, hummus or just mash up some avocado and lemon. I have included an interesting recipe for an oil free dressing below.

Toppings: Sprouts, chopped nuts, sunflower, sesame, or hemp seeds, kale chips, you name it. Pile it on!

-----

This oil free dressing recipe is from Dr. Greger's website nutritionfacts.org. You must visit it. He has informative, entertaining, and short daily videos. The dressing is slightly tart and delicious. While there is no oil added, it is not a fat-free dressing. Don't fear the fat! Some fat is necessary to help you absorb all the wonderful nutrition you're getting from this meal.

Dr. Greger's no oil dressing
Dr. Greger's Oil Free Dressing
Blend in high speed blender until smooth:
3 TB white miso
1/4 cup brown rice vinegar
1/4 cup water
2 raw carrots, chopped
1 small beet, chopped
1 inch fresh ginger, chopped
1 TB fresh roasted sesame seeds
(I used raw tahini)
I also added:
1 tsp Dijon mustard
freshly ground pepper

Depending on what kind of beet you use, the dressing will be yellow, orange, or red. I used an orange beet and the dressing was a deep golden color. Don't be alarmed by the addition of the beet. You cannot taste the beet, it just adds more nutrition and a beautiful hue to the dressing.

For more ideas here's a Roasted Buddha Bowl with the beans incorporated into a Creamy Lemon White Bean Sauce. You could also make a Mexican Bowl with brown rice, pinto beans, corn, shredded cabbage, zucchini, steamed broccoli, salsa, and avocado. Let's see, Asian Bowl, Indian Bowl, you get the idea!


Sunday, March 31, 2013

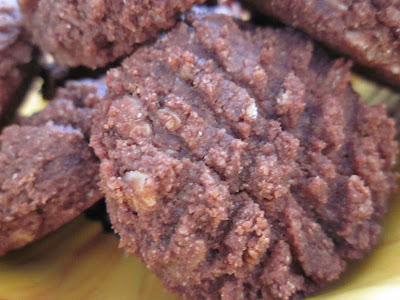
Chocolate Oatmeal Brownie Bites

 Chocolate Oatmeal Brownie Bites

If you need a chocolate fix, these are for you. These cookies are soft, moist, with the texture of brownies (more cake like – not gooey) with a most satisfying chocolate flavor. And quick to make. Recipe makes about 20-24 small cookies depending on your scoop and how much cookie dough makes it to the baking sheet. Excellent raw if you go for cookie dough. Recipe is an adaptation of Chocolate Almond Butter Cookies from the Practically Raw cookbook.

Ingredients

Dry Ingredients
1/2 cup coconut flour
1/4 cup almond flour
1/4 cup cacao powder
1 tsp baking powder
1/8 tsp salt
-----
1/4 to 1/3 cup quick cooking oatmeal


Wet Ingredients
1/2 cup almond butter
1/2 cup coconut palm sugar
1/2 cup non-dairy milk
2 TB agave syrup
1 TB ground flaxseed
1 tsp vanilla extract

Directions
Preheat oven to 350 degrees. Measure the dry ingredients (except the oatmeal)  into a large bowl. If any of the ingredients are clumping, take the time to sift them. Stir until combined.

Measure all the wet ingredients into a small bowl and whisk together. Add to dry ingredients. Mix well. Depending on how wet the batter is, add some of the oatmeal. Just add enough so batter is on the stiff side.You know, like cookie dough. The wetness factor depends on how thick/thin the almond butter is. The brand I've been using tends to be on the thin side so I use all the oatmeal.

Scoop onto cookie sheet covered with parchment paper. Press and flatten. I like to use a fork. Bake 8 minutes and cool on rack.

Options: Add some chocolate chips.

Chocolate Oatmeal Brownie Bites


Friday, March 22, 2013

Feeling Fat, Sick, and Nearly Dead? Omega 8006 Juicer to the Rescue!

Omega 8006 Juicer and Nutrition Center

If someone told me two years ago that I would get into juicing, I would have said "no way!" But it has happened. I guess it was inevitable. Part of it was the lust I have for new kitchen appliances and the fact I was having some minor but irritating health problems. It was the perfect storm.

A couple of months ago, I watched the movie "Fat, Sick, and Nearly Dead." I think the movie is a bit extreme but the take-away for me was to supplement my diet with juices. I have been researching various styles and brands of juicers and finally decided that the Omega 8006 was the right juicer for me. Deciding which juicer to get is a very personal decision. You have to decide what is the most important feature(s) and then choose.

1) What is your price point?
2) How important is the quality of juice?
3) How much time are you willing to spend cleaning the juicer?
4) How much time are you willing to spend preparing the produce to juice?
5) How much time are you willing to spend juicing?
6) How important is it that you extract the most juice from the produce?
7) How much room do you have to store it? Can it go on the counter?
8) What types of produce are you going to juice? Roots, leafy tops, fruit? Some juicers handle different types of produce better than others.

Those are lots of considerations but I think if you answer honestly you will buy the right juicer for you. It's also a good idea to spend some time on youtube watching comparisons and reviews.

Review of the Omega 8006 Nutrition Center

The Omega 8006 juicer is a masticating single auger style of juicer that is designed to juice slowly at 80 rpms. There is less oxidation that way. And it is slow. It has a rather small 1-1/2 inch chute in which to feed the produce so you have to cut all the fruit and vegetables small enough to fit. This can take some time.

One huge feature of the Omega 8006 juicer is that it is quiet. The quicker centrifugal juicers (think Jack LaLane and Breville) tend to be very loud.

It is very easy to take apart and clean. There is only one very small area that you have to scrub with a brush.

I like the handle on the top of the unit. It is a bit big but not overly so and has not dominated my counter. I keep in the corner and it's easily pulled out when I want to use it.

The pulp is fairly dry so I feel I am getting most of the juice from my organic produce.

The juice is delicious. The only time I've not been thrilled is when I get carried away juicing things like kale and add too much. I find myself drinking juices that I would never have dreamed of drinking before like dandelion, kale, chard, cucumber, ginger, and beets. I never liked beets but find I love them in my juice!

The price on this unit is around $250 or so. The only thing I really don't like is the fact it's made out of plastic – body, augur, etc. The tiny screen is metal. But it does a pretty good job of looking like it's chrome.

This is called a nutrition center because you can make pasta, nut butters, etc. If and when I use those features I will post a update.

I think some folks could get a bit impatient with the time it takes to prepare the produce, juice, and clean but it's time well spent. I have been drinking a tall glass of juice every day and while my original irritating health "problem" is still around I feel great! Amazingly great.

Saturday, March 16, 2013

Almond-Date-Chocolate Chip Squares

almond date chocolate chip squares with lucuma and maca powders

This is a quick delicious treat full of healthy ingredients. Some of the ingredients you may not be familiar with such as maca and lucuma powder. Maca is a Peruvian superfood made from raw maca roots, which are gently dried and milled. Navitas Products says "mx into smoothies, baked goods, or cereal; may boost the libido, treat menopause symptoms, and promote hormonal balance for men and women." Lucuma has a sweet, maple flavor and is made from the lucuma fruit. It is an excellent source of carbohydrates, fiber, vitamins, and minerals, and contains especially high concentrations of beta carotene, niacin, and iron. Neither product is inexpensive but a bag of it will last a long time and is also delicious to use in smoothies and baked goods.

I got this recipe from LisasProjectVegan and quartered it. Here is the full size recipe; I am not sure how many it makes but my version made about 9 squares. What I really like about Lisa's recipes is the fact most are very quick to make. She cooks all but two meals per week and spends less than 30 minutes making each meal. If you'd like to learn more about how Lisa does it, here is a short video interview. (If you're on a mac you may need to watch it with Safari; it didn't want to work with my version of Firefox.)

You may be tempted to leave out the maca and lucuma since the recipe uses only a small amount of each but don't. Each powder adds a subtle taste profile that I personally found out of this world!

Almond-Date-Chocolate Chip Squares
1/2 cup raw almonds
4 pitted Medjool dates
1-1/2 tsp water
1/2 teaspoon maca powder
1/4 teaspoon lucuma powder
1/4 teaspoon vanilla powder
1/8 teaspoon salt
2 TB cup mini vegan chocolate chips

Directions
Pulse almonds in a mini prep until roughly chopped. Take out half and reserve in a mixing bowl. Chop the dates and add them into the processor along with the water, powders and salt. Process until completely together. Turn out into the mixing bowl with the chopped almonds and add the chocolate chips. Mix well and press into a small pan or container. Chill for an hour and then cut into squares.  Makes about 9 squares.

Recipe Variation
Leave out the 1/8 teaspoon salt and instead sprinkle some coarsely ground red Himalayan salt over the top.


Thursday, February 7, 2013

Quick Chocolate Oatmeal Drops – No Cooking Required


My mother used to make chocolate drops when I was a kid that were so scrumptious. I don't have the recipe but I remember watching her melting margarine in a sauce pan, and then adding white sugar, cocoa and oatmeal. After it was combined, she'd scoop spoonfuls on to a piece of wax paper. We'd eagerly wait for them to cool. Sometimes. They were still great when warm.

While I don't have that recipe I came across instant cookie dough in The Happy Herbivore. After I made them I realized they tasted a lot like my mom's chocolate drops. But without all the fat and unrefined sugar.

Quite honestly, you could do a lot with this recipe. Use peanut butter instead of almond. Sub out the cocoa with raw cacao powder. Use some flaked coconut with the oatmeal. All you need is a consistency that will stick together. Taste as you go, if it's not sweet enough add a bit more maple syrup. You get the idea!

chocolate drops
Ingredients
1/2 cup quick oatmeal
1 TB almond butter
1-1/2 TB maple syrup
1 TB cocoa

Directions
Mix all ingredients until well combined. Scoop spoonfuls onto wax or parchment paper. Let sit a bit to harden. I like to put them in the refrigerator for about an hour. Makes about 6 chocolate drops. Recipe is easily doubled.

Saturday, February 2, 2013

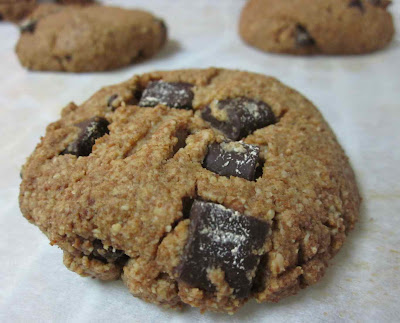
Chocolate Chunk Sandies – Gluten and Dairy Free

gluten and dairy free chocolate chunk cookies

I enjoy trolling the gluten-free blogs and websites mainly because the recipes don't use all purpose flour. I prefer to bake and cook with whole grains especially when bowing down to the sugar god. This recipe uses almond flour. The original name of these cookies are World's Best Chocolate Chunk Cookies (Gluten/Grain/Egg/Starch/Sugar Free & Paleo) from the Real Sustenance website. I followed the recipe using coconut date sugar and coconut oil options. I also had on hand a bag of chocolate chunks so I didn't have to break up a chocolate bar. This recipe was very quick to pull together. I am calling them "Sandies" because the texture reminded me of Pecan Sandy cookies, kind of crumbly but still very delicious.

Here is the recipe, which I successfully halved.